Also referred to, at least around here, as “Girlled Cheese Sandwiches”. It makes about as much sense; after all, I don’t cook them on a grill (I use a griddle), and, at least around here, they’re always made by girls.
Once upon a time, I got a subscription to Cook’s Illustrated. I think I was in my mid-teens. Anyway, I heard it was supposed to be a very technical magazine, which was why I was interested in it. (I’m one of those people who was utterly fascinated by getting chef textbooks out of the library, those books where they show you the proper way to use a knife and cut an onion.) I was utterly disappointed by the magazine. My memory says it was short on illustrations, 97% opinion, 2% keeping your eyes open while you worked and experimenting, and 1% technique. Well, thank you very much, I already had plenty of opinions, and didn’t see the need to pay that much for them. As for experimenting and keeping your eyes open, yes, it could be handy to have that work done for you already, as long as they were writing on a topic that was actually relevant to you. But, in that case, you’d usually already figured most of it out yourself.
The straw that broke the camel’s back was when they ran an article on the “best” way to make a grilled cheese sandwich, as though that was a great mystery. I’ve been making grilled cheese sandwiches for nearly as long as I can remember, and all the “wrong” ways were so absurd I’d never even tried making them that way. I read the article, thought “Duh! I’ve know all of this since I was 9 years old,” and canceled my subscription. I figured they ought to be handing out more insight than 9 year old, if they expected me to actually pay for it.
But, just in case they were right, and people really do want to be shown how to make grilled cheese sandwiches, I thought I’d do it properly. (But I didn’t just “discover” this method, and I make no claims it’s the “best” way. It’s just my version of common sense and good taste.)
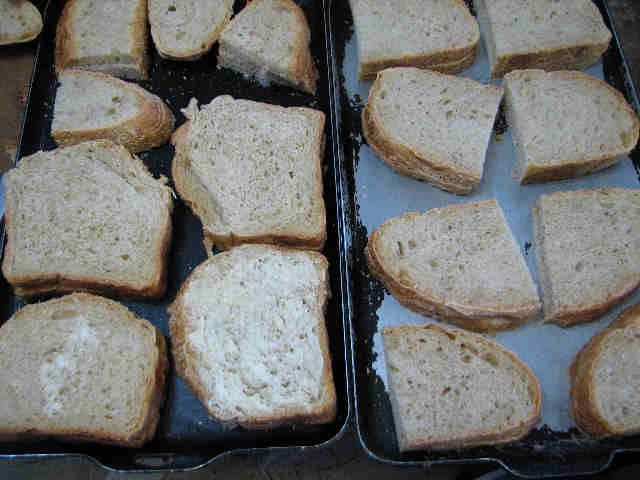
To make sandwiches, you first have to start with the bread. You can use anything you have laying around, like this:

I made that bread a week ago, when cooking marinaded chicken. The bread used a starter, and long, cool raises, and then was baked on stones. I was quite impressed it hadn’t begun to mold or sour, and was only just beginning to dry out. I also used some loaf-bread I had made, ’cause this one loaf wasn’t enough. (I need to make three griddle fulls before everyone’s properly fed. This loaf made one griddle full.)
It should go with out saying that the better quality bread you use, the better your sandwich will be. Don’t think you can use some putty-like saw dust bread and get a good sandwich. Good bread makes good sandwiches, and bad bread makes bad sandwiches.
Slice your bread, assuming it isn’t a pre-sliced bread.

Arrange your bread in sandwiches on your griddle.
A good griddle is a thick griddle. They’re hard to find now; if you’ve still got your grandmother’s griddle, hang on to it. And don’t get suckered by claims of “non-stick”–I’ve yet to see a non-stick coating that didn’t come off the pan easier than the food came off the coating.
Butter your bread, every slice, the outside face only.

Use soft butter, or you’ll tear your bread. Anywhere the butter doesn’t touch won’t brown, but you don’t want to put the butter on too thick or you’ll wind up with a soggy, greasy sandwich.
Grate your cheese.
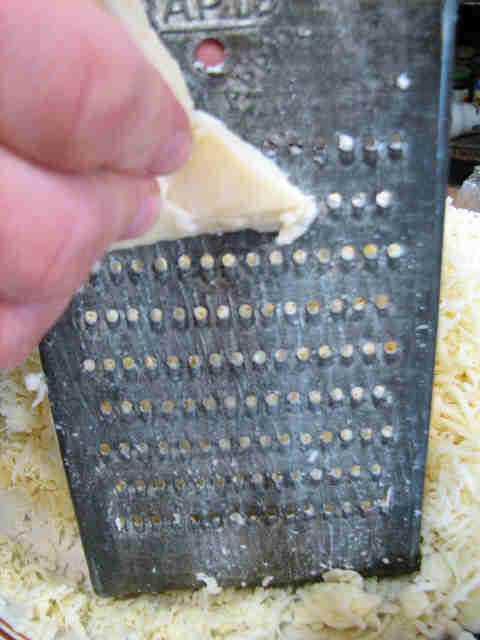
I got a minion to do this for me, so those aren’t my hands, in case you’re deathly curious.
I’m using swiss cheese, and a fine grater. The grater used to belong to a great-grandmother of mine, and they don’t make graters as sharp as they used to anymore. The finer you grate it, the easier it is to distribute evenly. Don’t go thinking you can just take out one of those plastic, square shaped slices and call it evenly distributed cheese–that stuff is pushing the boundaries of “edible”, and we’re talking about making food here. You can use any cheese you want, but it’s the same deal as the bread–the better the ingredients, the better the final product. If you don’t have to keep whacking people for trying to eat up all your cheese before you get it in the sandwiches and melted, you aren’t using good enough cheese.
Next, you add the cheese and seasonings to the bread.

I’m using coarse ground black pepper and garlic powder. If you use muenster or mozzarella cheese, basil and oregano go great. Fresh rosemary would probably be good, too, but dried stuff is miserable. I used about 2 lbs. of cheese for 3 griddles of sandwiches. I open up half the sandwiches, put on the cheese and seasonings, and then close the sandwiches. Then I do the same for the second half. Arranging things on the griddle is really only important because I’m using homemade bread, which is slightly irregular, and you need to see how things fit together. If you were using very regular bread, you can just butter all the bread, lay down one layer, put on the cheese and seasonings, and then lay down the second layer.
Pop them on the stove, and turn on the heat.
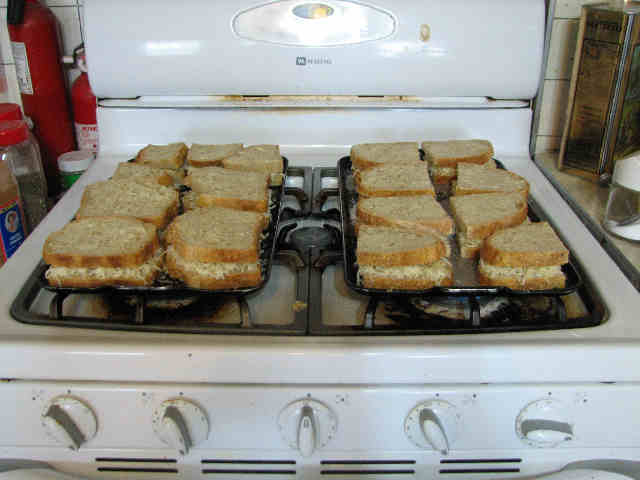
The heat needs to be at “medium”. With my old gas stove that had all the markings wore off, this meant until the flame burned straight up, with no curve, and was pure blue, with no streaks of orange. With my new gas stove, that means “medium” on the back burners, “low” on my hottest burner, and “medium low” on my medium burner. The flame matches the description of my old stove, so I think that must be a pretty accurate description of the temperature. But the point of the heat is get the sandwich to cook right–too hot, and it will burn around the edges, and maybe even cook the bread before the cheese melts. Too cool, and your bread will get soggy from melted butter, and the cheese will start melting out of the sandwich before the bread burns.
Check to see if they need to be flipped.
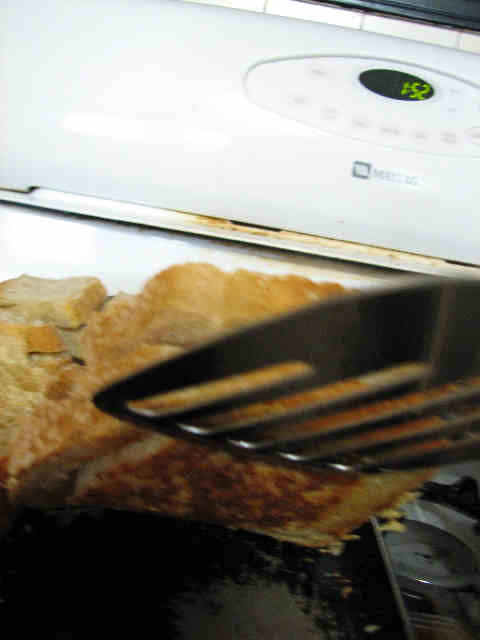
This is accomplished by sticking your spatula under a sandwich, and lifting it up for a peek. For best cooking, a sandwich should only be flipped once, so wait until the underside is dark golden brown before you flip anything. Once that side is fully cooked, you can flip everything over.

Look good, don’t they? Now you just need to wait until the second side cooks, but since the griddle has had plenty of time to get hot, it will be a much shorter wait. If you don’t keep an eye on them, they’ll burn.
Then they’re done, and ready to eat!
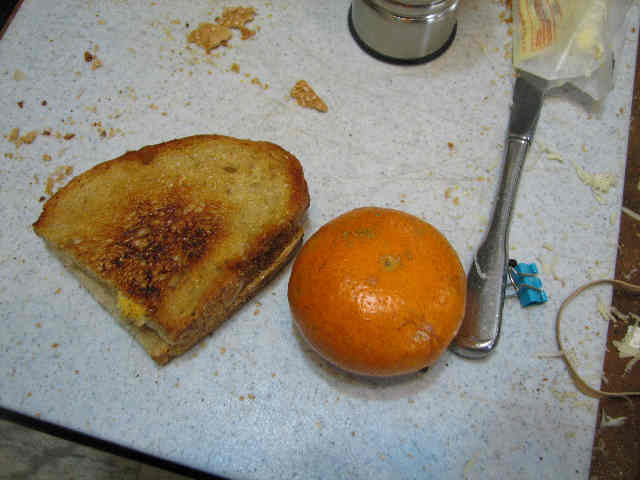
Since grilled cheese sandwiches are by nature high in fat content, it’s best if you can eat something a little acidic with it. I had a tangerine, but I bet the muenster/mozzarella sandwiches would be great dipped into a good tomato sauce.
Posted in Recipes | 1 Comment »
More gravy. When you need to really stretch the leftover’s from the night before, your choices are generally gravy or soup, and when your audience doesn’t really care for soup but does like gravy. . .well, you wind up making a lot of gravy. It effectively spreads out the protien without leaving people hungry.
The chicken in question is cooked in balsamic vinegar, garlic, rosemary, bay-leaf and lots and lots of mushrooms. Leftovers are scarce, because this is a popular meal. However, these leftovers do have flavor, and it merely needs to be encouraged. A faulty stretching of leftovers is one which dilutes the flavor as well as the main ingredients, producing an unsatisfying meal.
Once again, I start with a stick of butter and 1/2 cup flour. My liquid is one can concentrated chicken broth and two cans water. I slice the chicken and the mushrooms–the smaller the pieces the more even their distribution. I put dried rosemary leaves (not ground rosemary) and dried bay-leaves in a tea-cup. Ground rosemary tastes a lot worse than the whole leaves; I’m not sure why, but ground rosemary has a strong tendancy to taste like dirt. However, the whole leaves can feel quite pokey and prickly in the mouth. So I pour boiling water over them and let them steep a while, to soften them up and release the flavor.
After adding the chicken, herbs, and any leftover liquid from the night before, you’ll have to taste the gravy. I needed to add granulated garlic powder (real garlic in the butter would have been even better, but I forgot), and more balsamic vinegar. I also added more water to thin it out more.
I usually serve this over rice or egg noodles. My barbarians prefer Jasmine rice, so we make a big pot of it–5 cups of rice, and 7 1/2 cups of water. I put the rice and water in the pot, bring it to a boil, and then lower the heat as much as I can. I don’t remember the exact cooking time, but the rice is done when you tilt the pot and can no longer see any water in with the rice. Rice should be covered when it cooks, but not totally. If none of the steam can escape, the rice tends to be kind of soggy and mushy. We have a lid with a little hole right in the center, and that works well. But when I have to make a small amount, I just use a small saucepan and leave the lid slightly askew.
Posted in How to Stretch | No Comments »
You know what I mean by “Baked Chicken”. The chicken you ate last night drowned in ketchup or gravy. Usually it’s chicken breasts with some kind of breaded topping–crushed cornflakes, or seasoned bread crumbs. Now it’s the next day, and the chicken hasn’t gotten any more moist or flavorful. Now what?
Well, I make a meat gravy. I’m sorry for the unoriginality, but it’s just a really good way to use up leftover meat. Since this kind of chicken doesn’t have much flavor itself, I prefer to make a seasoned gravy.
I peel several cloves of garlic, and chop them up. I cook that in a stick of butter, and then add 1/2 cup flour and 1 TB. chicken boullien powder, and cook it till it’s brown and bubbly. Then I add one can of concentrated chicken broth, 2 cans of water, and one can of evaporated milk. That’s the basic gravy; you just have to stir and cook until thick.
Next you add your chosen seasonings. I used basil, oregano, black pepper, and granulated onion powder. I also used some grated parmesan cheese (maybe half a cup?). You have to be careful not to add too much, because it does make the gravy saltier. This is kind of what I call “Chicken Gravy, Italian Style.”
And then, of course, chop up the meat, stir it in, heat it through, and serve over mashed potatoes or toast. Warm, flavorful, and filling.
Posted in How to Stretch | No Comments »
There is a poor sprite that drifts about these walls. She is entirely ungrounded in logic, or reason, or reality, and one never knows quite exactly where she is. I’m not entirely sure she knows where she is. At any rate, I feel I am constantly saving her life, either by reminding her to eat, or to sleep, or to come in out of the cold, all things which she has a propensity to either forget, or not see the use of, or simply find unnecessary, or hadn’t quite gotten to yet (even if it is only 6 degrees F and dropping, and dark out). Today I once again saved her from near certain death.
She cooks dinner once every other week, and today conspired to make Black Beans and Turkey (except, with ground beef) and Rice. This is taking life in her own hands, because it not only has the dubious beans, but also rice and soy sauce, two things which the most barbaric barbarians regard as an abomination. One might almost think she meant it as an act of hostility toward them, but this betrays a misunderstanding of the sprite. She simply never considered reality, or facts, among which includes a particularly hibernative barbarian being dragged out of bed at the utterly unreasonable hour of 5 am, and forced into labor.
So, in order to save her life, and theirs, and possibly even mine (I sit next to them at the supper table), I went about concocting emergency rations. The wilde beastes would need taming tonight, and that means food, namely dessert. With whatever ingredients were on hand. I chose Pound Cake.
The popular barbaric assumption is that Pound Cake is titled as such because you pound the cake, or pound someone with the cake, or pound someone in order to keep the cake as your own. At any rate, something to with pounding things, preferably people. In reality, Pound Cake is named such because this old recipe has very scientific beginnings, in which a pound of sugar, a pound of butter, a pound of eggs, and a pound of flour were all combined together and crammed in the oven.
Today’s recipe has been monkeyed with, and no longer has such elegance of proportions, but it is still nothing like that farce in a box that proclaims it is mix for ‘Pound Cake’ and produces only a light, fluffy, white cake. Pound Cake is golden yellow, very heavy and fine, has a chewy crust, a pleasant egg-y flavor, and cannot come out of a box at all, when so much of it is eggs and butter. It is best served with fruit, but is still quite good without.
Just as the ingredient list comes first, it is also wisest to gather all your ingredients, so raid the cupboards and freezers. The act is generally known in the highfalutin’ cooking world as mise en place, and which I cannot help but transliterate to missing place, generally meaning “See what’s missing from its place, lest you find yourself half-way through and in need of a few eggs, necessitating calling upon your neighbors to see if they might have one to spare.” Even barbarians like having neighbors around every now and again, though taking a break half-way through a recipe to drive a couple miles off and back again for an egg is still not as smoothly as things are meant to progress.
Usually, when said highfalutin’ cooking world depicts mise en place, they show all these cute little bowls carefully arranged, neatly and artfully, in front of a white clothed chef with the expression of cat who’s just caught a canary. Though I am not highfalutin’, I am no less artful in my missing place.
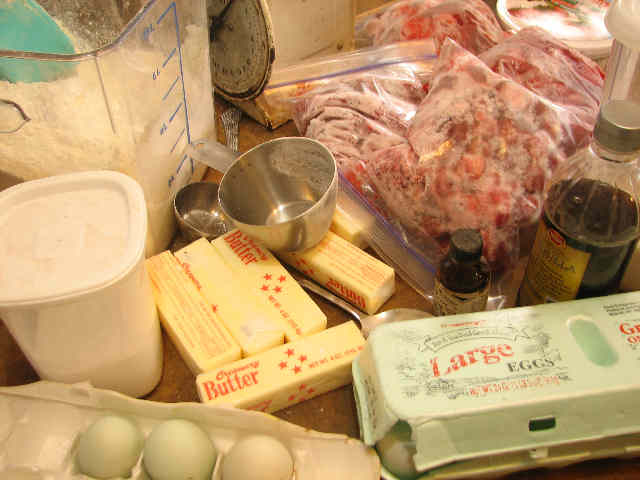
For 3 9″x5″ pans of Pound Cake, you will need:
6 sticks of butter
5 cups of sugar
15 eggs
6 cups of flour
1 tsp. salt
1 tsp. vanilla extract
2 tsp. lemon extract (or orange, or coconut)
Fruit of your choosing (I am using 16 cups of frozen strawberries, 8 cups sliced and 8 whole)
Preheat your oven to 325.
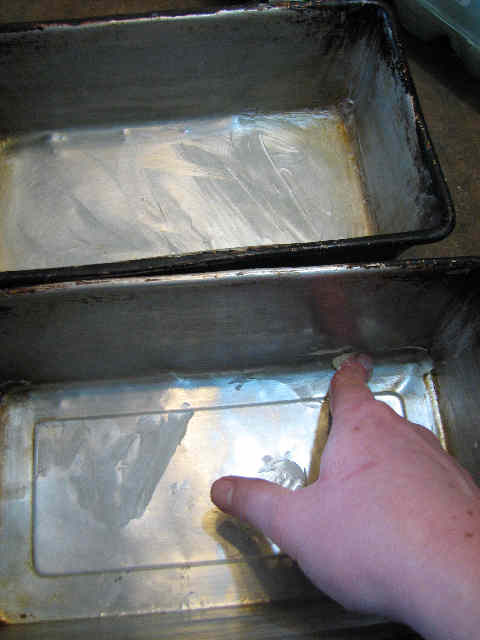
Butter three 9″x5″ baking pans. Don’t forget the corners and sides.
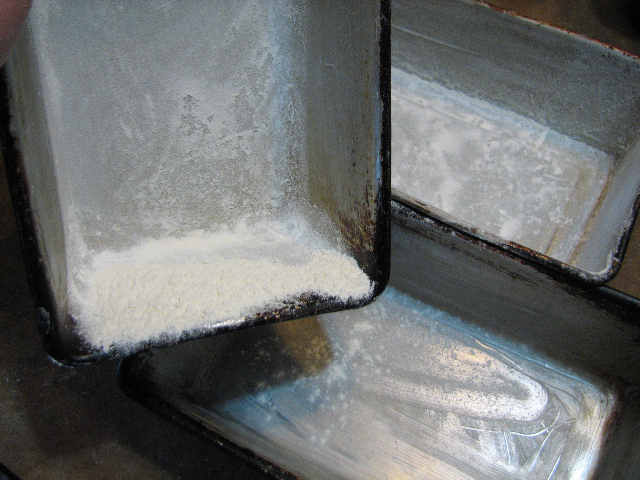
Flour them. I shake around the flour of one pan over the others, so any “spilled” flour can simply be used to flour the other pans.
And now, pray you have a mixer sufficient to the task. Meet my comrade in arms.

We don’t actually get along so well. I’m continually filling him to capacity, which he finds both uncomfortable and very difficult to manage. Meanwhile, I can’t stand his high-pitched grinding, especially since I already have to put up with so much other noise, high-pitched and otherwise. But for certain tasks, we declare a truce and generally work with each other. Pound Cake is one such task, and I would be loathe to be without him. (Don’t let my father hear I said that.)
Since I pulled my butter straight from the deep freezer, it is, of course, rock hard. Or as rock hard as pure fat can be. I chop it into chunks with a bench knife and pile it into a microwaveable vessel, and play a game of luck and chance attempting to get it soft enough for the mixer to handle without melting it. I lost.
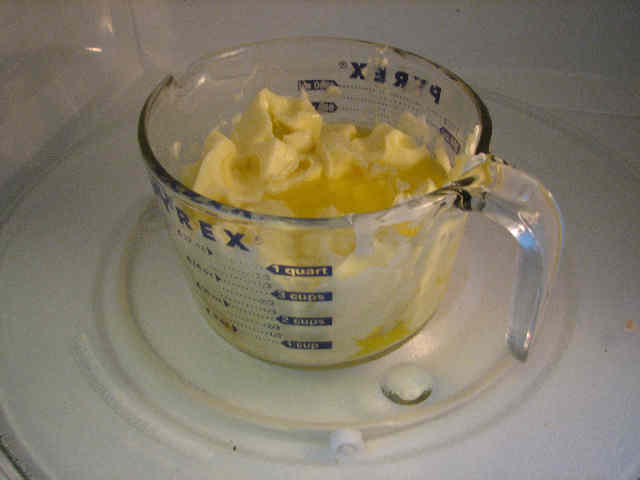
No matter, butter is butter, and it is still hard enough to cream. In goes the butter.
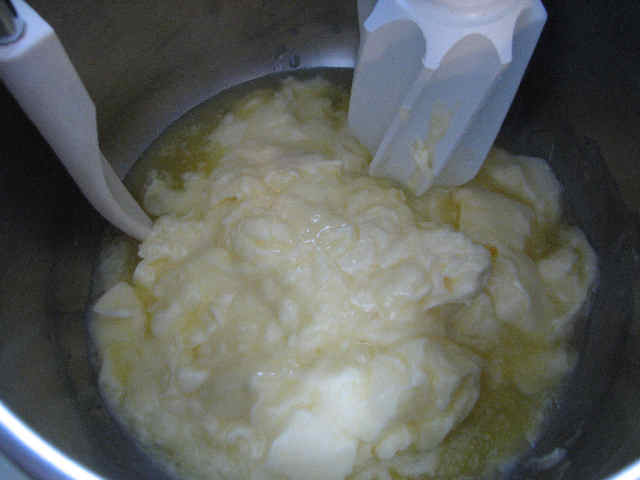
In goes the sugar (gradually).
And the machine cheerfully creams it creamier than you’ve ever seen butter and sugar get creamed. It is very white, and very fluffy.
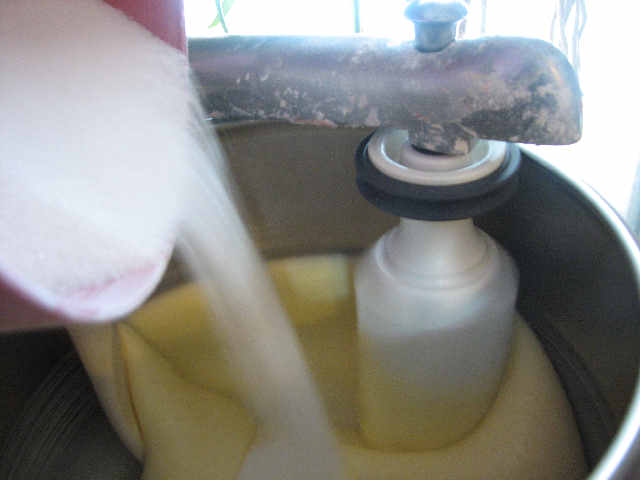
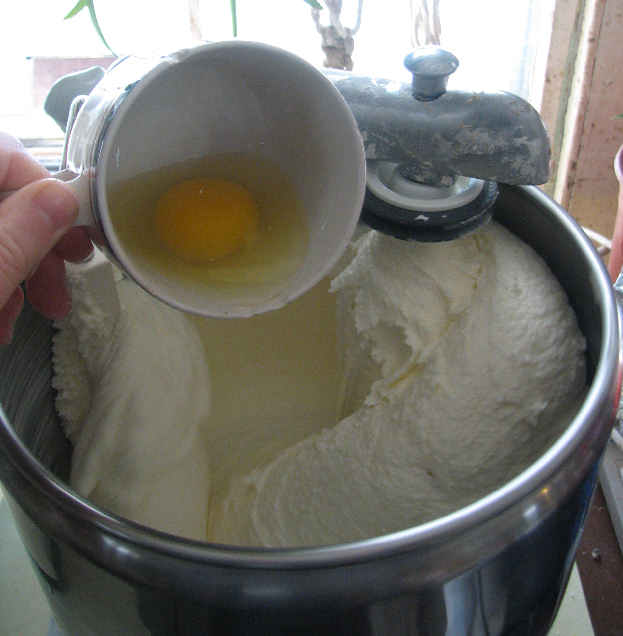
Next I begin to add the eggs, one by one. This is the part that makes mortal mixers cry like babies, because the mixture gets so thick. If you’re adding eggs while your mixer is running, be careful. I added one of my eggs rather carelessly, and shortly thereafter had to get out of the way as parts of egg yolk went flying.
You may have to stop the mixer and scrape down the sides occasionally. Even my mixer misses some of the corners.

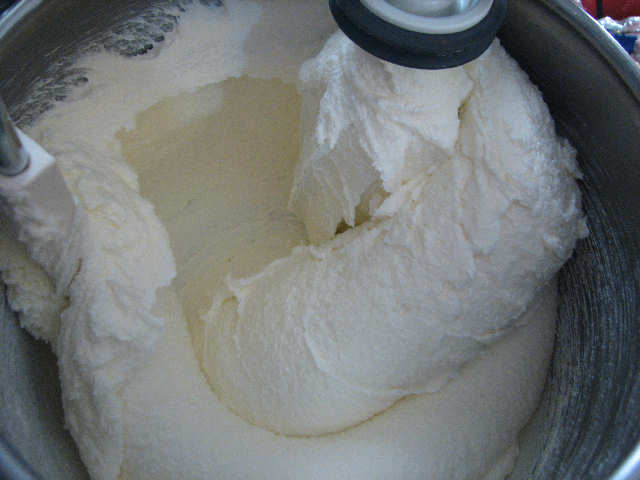
Having mixed in all the eggs, it still looks very fluffy, but is now a nice golden color.

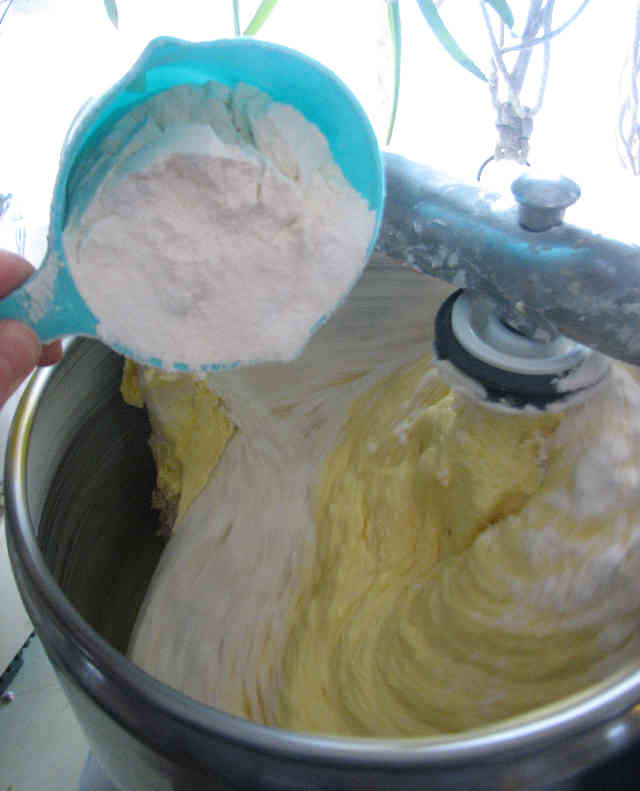
I do not sift in the flour, but it is important to mix it as little as possible at this point. Up until you put the flour in, the more you mix it, the lighter the cake will be. After you add the flour, any amount of mixing will encourage gluten development, and a tough, chewy cake. Mix it until just barely incorporated. Though the batter has a lot of air mixed into it, it is very, very heavy. I’ve sent many a good mixer to an early death making Pound Cake.
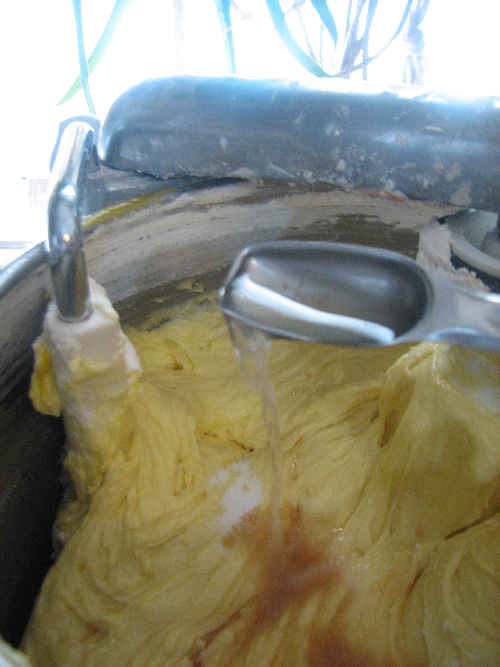
Add the salt and extracts, and again, mix as little as possible.
Dump it into the prepared pans.
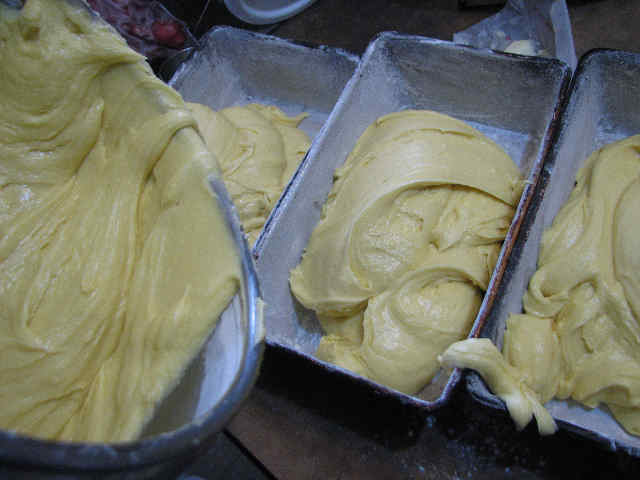
Smooth them off prettily, like you’ve just caught a canary. . .

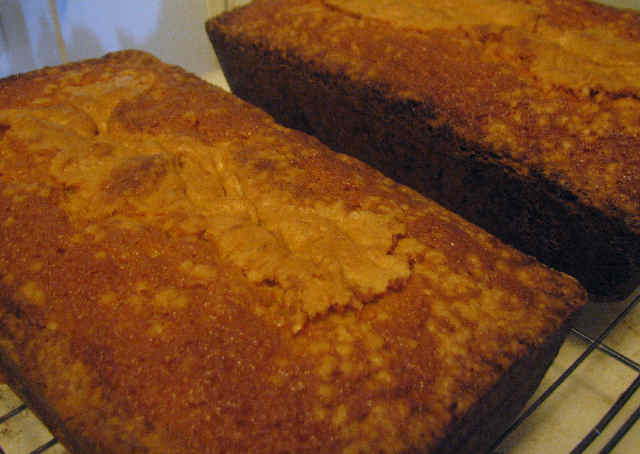
. . . and pop them in the oven for an hour and a half, or until a tooth pick inserted comes out clean. (If your oven runs hot, you’ll want to check them early.) They will be a deep golden brown on the top. Let them sit 5 minutes, and then turn them out on a rack to cool.
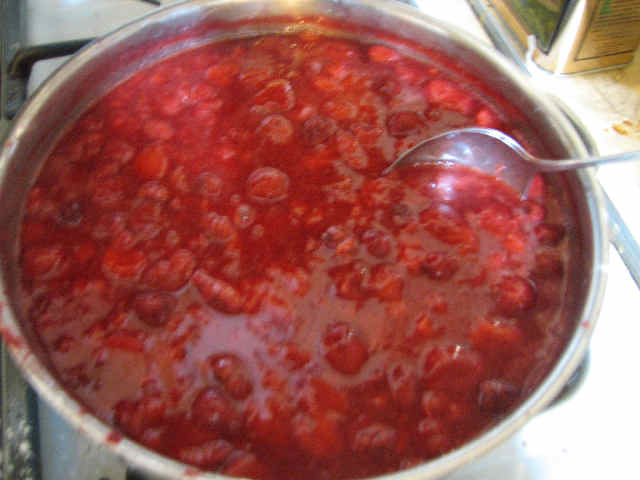
You can pop together the fruit sauce at the very last minute. I put my 4 bags (16 cups) of still mostly frozen berries in a pan, added 4 very generous soup-spoonfuls of cornstartch and one cup of sugar. I left it on low while I ate supper, but that hardly made a dent in it, so I turned the heat up to high, and kept stirring it. By the time the berries defrosted, the cornstarch and sugar had also thickened it.
Here’s what you have:
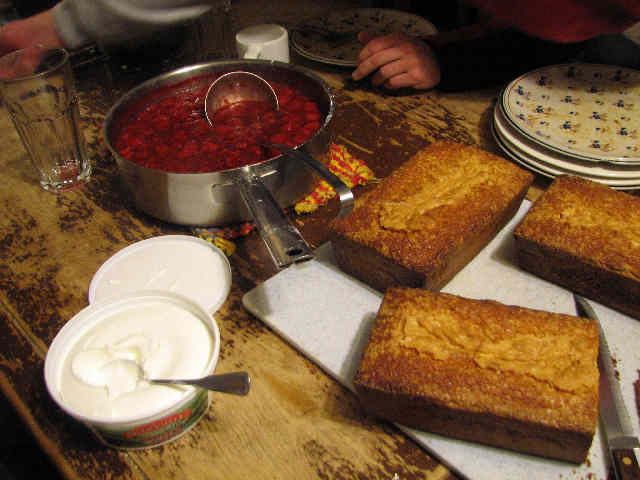
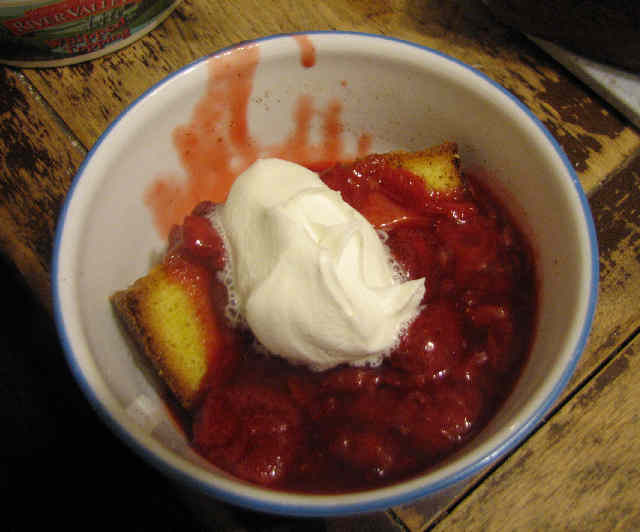
The original recipe says to “slice very thin”, which is of course a very funny joke. Take a nice slice,
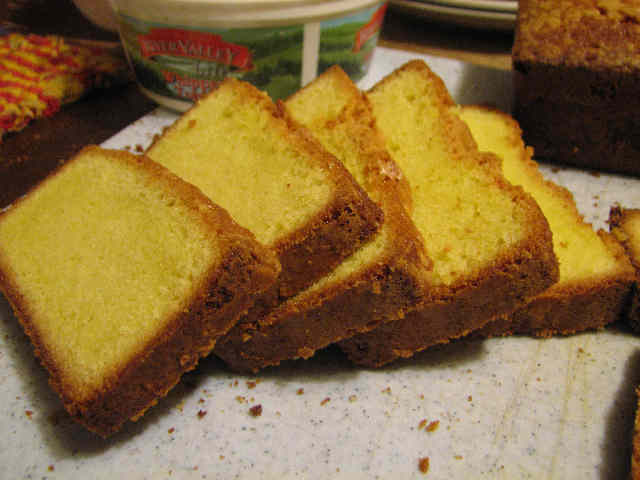
put a generous ladleful of berries over it, add a dab of “whipped topping” (real whipped cream is of course much better, but generally not on hand during sudden emergencies), and enjoy.
My barbarians rapidly devoured all the strawberries, and two of the pound cakes. The third pound cake made scanty leftovers the next day. The matriarch said she didn’t care for warm strawberries, which was generally dismissed as absurd by the rest of the barbarians. The patriarch was trying to watch his cholesterol, so he ate (and thoroughly enjoyed) his warm strawberries over torn up, fresh-baked bread.
Posted in Recipes | 1 Comment »
Last night we had corned beef for dinner, and we had a fair amount left over, but not overly much. I decided to make a gravy much along the lines of the old timer’s favorite, chipped beef on toast. After peeling 6 lbs. of potatoes with the two youngest barbarians, I started on the gravy.
I generally improvise my gravies, but a good rule of thumb is about 1 TB flour for every TB butter, and for every TB of butter, a 1/2 a cup of milk. Today, I used a stick of butter, a heaping half cup of flour, and somewhere over 5 cups of milk (I thinned out the gravy more after I added the meat; it looked to thick to my eye).
You melt the butter, add the flour, and cook until it’s bubbly and starting to brown. That’s technically called making a roux, but most people here can’t even pronounce that word, never mind know how to use it.
Next, you’re technically supposed to add the liquid (here, I used milk, but it can be broth) slowly, mixing well after each addition. We just dump all the liquid in at once. Since the flour has been coated with the butter, it won’t lump up. (It may seem so at first, because the butter will harden in the cold milk; but once the butter melts again, you’ll have a smooth thick sauce.)
Cook and stir until thick. If you sit there and babysit it, you can have the heat on high the whole way, but if you keep turning your back, doing other things, and generally not stirring constantly, you should have the heat on lower.
The corned beef gets trimed of excess fat, and cut into small pieces. Then it gets uncerimoniously dumped into the gravy. Because the corned beef is already so salty, I don’t make this gravy with broth, which usually has large amounts of salt itself. But I did add very generous amounts of freshly ground pepper.
When the potatoes are done cooking (I use a pressure cooker, 15 lbs. pressure, 2 cups of water, and 10 minutes cooking time after the weight begins to rattle. You can also just boil them, but I feel they’re more watery and flavorless that way.), they need to be mashed. Always add the butter first, or you will have very glue-y potatoes. I had my minion use a stick of butter. Mash the potatoes with the butter until you are satisfied with the lumps or lack thereof. Then splash in as much milk as you desire, and just briefly mash that in to mix. You can use salt (usually) or pepper (not so usually) as you desire, but in the case of this particular meal, I felt the corned beef supplied all the salt that was needed.
The resulting mess is a very good way to use up corned beef. The gravy is soothing and ever-so-slightly sweet, and counter-balances the salty meat. It is warm, it sticks to your ribs, it has sufficient amounts of protein and starch, and tastes good to boot. The youngest male barbarian made noises about how he thought leftover corn beef is better shredded and cooked in scrambled eggs, but he was quickly drowned out and shouted down by other barbarians who much preferred the gravy and potatoes to scrambled eggs.
If you don’t happen to have enough potatoes on hand, or perhaps don’t care for them, or the work, or the time, you can always use toast instead. This is generally frowned upon for two reasons by my barbarians. For one thing, the toast will get soggy, and that is gross. For the other thing, there is only one toaster, with only two slots, and many, many more barbarians.
Posted in How to Stretch | 2 Comments »