
I know I claimed it was against my religion (or something like that) to tell people what was or was not the “best” of anything. So. . .
(1) I didn’t name them this. It’s not my fault, I swear!
(2) Even if I had named them this, I would make an exception for these brownies. You have to make an exception for these brownies. They are the standard by which all other brownies are judged. Make these brownies and you will never, ever again say “Why bother make them from scratch? It’s so much faster from a box, and they taste just as good!”
Not.
You simply don’t understand the full meaning of the word “brownies” until you’ve had these. Come with me on the path to enlightenment, my friend. This is where the good life starts:
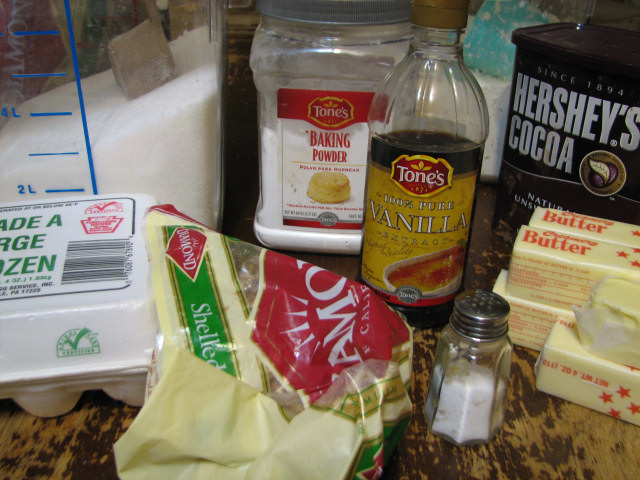
5 1/3 sticks butter
5 1/3 cups sugar
2 tablespoons vanilla
6 eggs
2 2/3 cups flour
2 cups cocoa
1 1/2 teaspoons baking powder
dash of salt salt (original called for 1 1/2 tsp., but I never do)
2 2/3 cups chopped nuts (optional, if you’re allergic or don’t have them. Otherwise, stand up straight and take your medicine!! Or not.)
And this, my friend, is the foundation of all life:
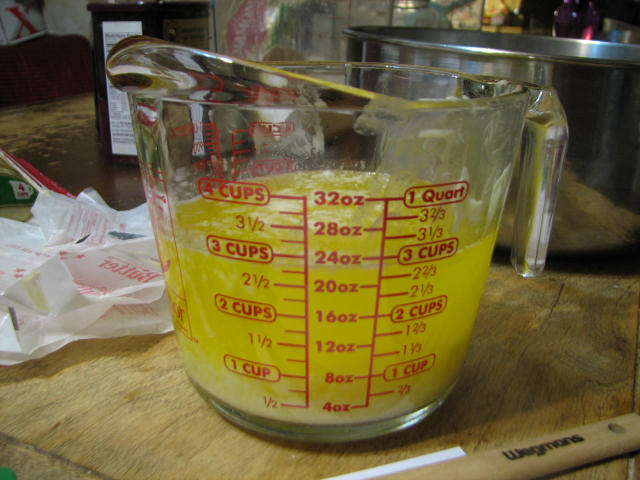
Melt your 5 1/3 sticks of butter.
One time someone had these, and the boys heard her raving about them to someone else. The list of wonderful attributes included everything from tasting good, curing cancer, and being low-fat.
Whoa, now! Not low fat. Not on your life.
Curing cancer, maybe, but no, not low-fat.
See, the problem with a lot of brownie recipes is they either make them too sweet or too chocolatey, or both. I know some of you are crying “Heresy! Burn her at the stake!” when I say too chocolatey, but have you ever had chocolate that is 98% cocao? There is such a thing as too much of a good thing. You can’t enjoy it when it’s that powerful; the human senses weren’t designed to take it. It’s like being hit over the head with a sledge hammer. I have had a lot of low-fat brownies that were simply too intense. It was like eating cocoa out of the box. I think they were attempting to compensate for the lack of fat by distracting you with such powerful doses of chocolate.
Anyway, my point was, this recipe is in balance. You will not be killed by over-doses. Unless you eat a lot of them. Each bite is balanced. How many you eat is the point of your own responsibility. I bear absaloutely one hundred percent no responsibility if you eat both 15×10 pans of brownies yourself, in one sitting. That’ll probably take you down. But you will die happy.
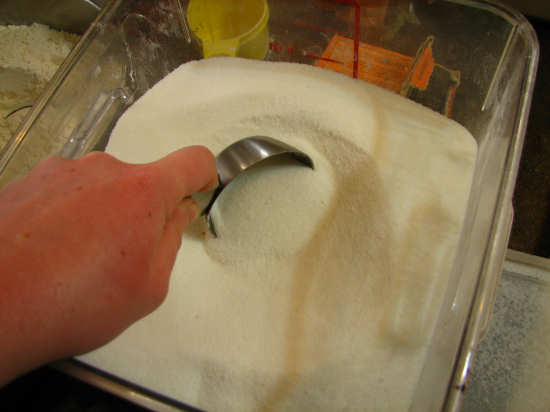
We do believe in sugar around here:
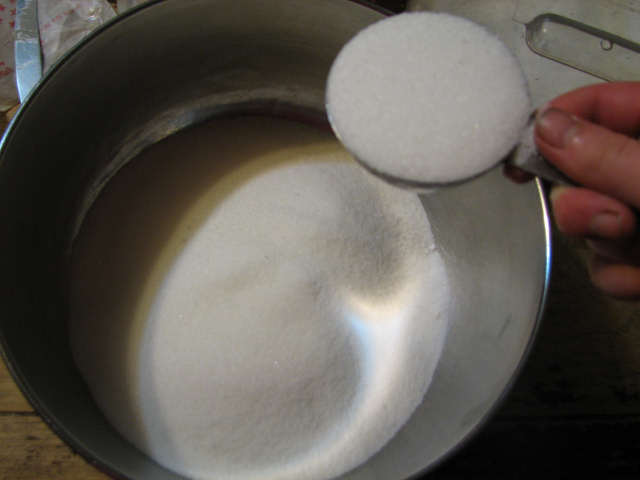
Put your 5 1/3 cups of sugar in a great big ol’ bowl.
Yes, I have dirt under my thumbnail. That’s the real home-place of life. I was starting seeds earlier in the day. But don’t worry, it was sterile seedstarting mix. Sterile, ya hear?! It means everything in the dirt was killed dead. It’s clean dirt. Don’t worry about it.
If it bugs you, remember to clean out under your nails before you make this recipe. Me? I’m a Troll. And I bake for Barbarians.
Pour your melted butter on top of the sugar.
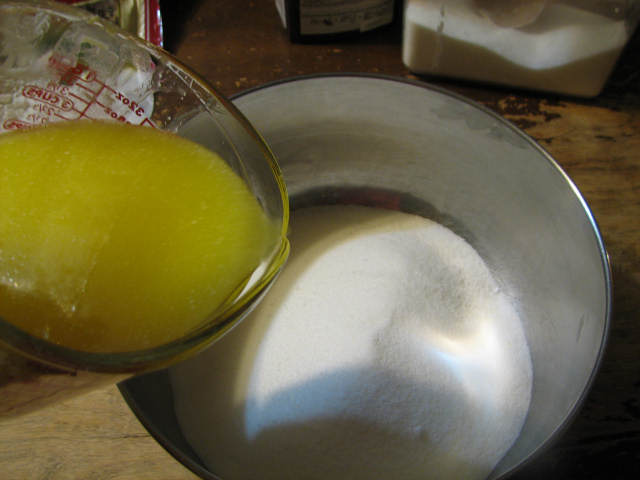
This is the foundation of all that is good and right in the world. . .
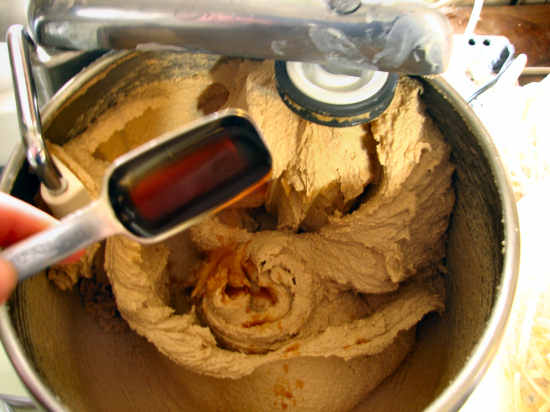
Now add your 2 tablespoosn vanilla. The real stuff, not the fake stuff.

Did you know that every vanilla flower lasts for only a day—and sometimes less? And that every blossom has to be hand pollinated? There is one type of bee that will pollinate vanilla blossoms, but they don’t believe in being exported. So all the vanilla plantations need every single flower (and ONE flower equals ONE bean) pollinated by hand.
Oy.
You can read more about it here.
Thar. I hath educated you. You’ll never again look at vanilla in the same way.
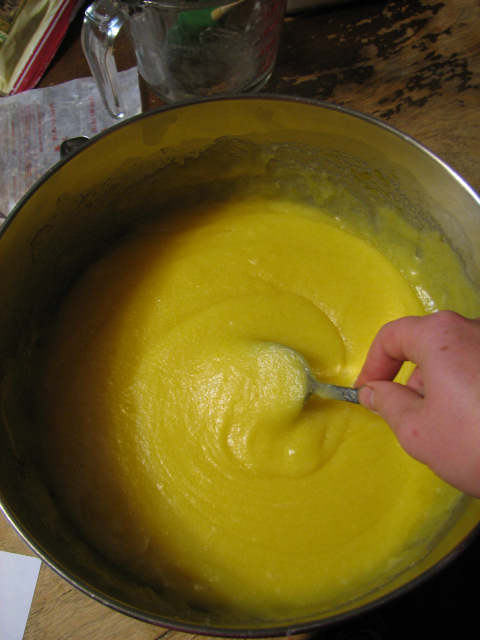
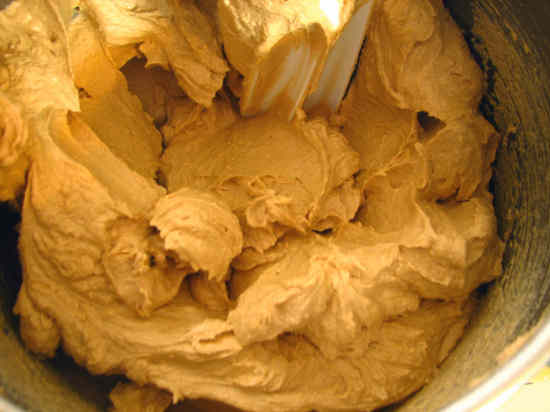
Stir it all together. . .
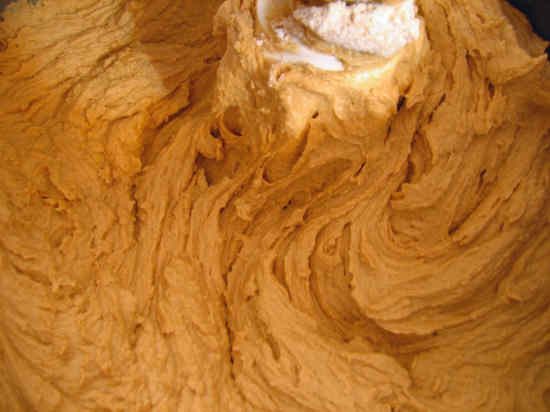
When you’re all done mixing it, it should basically look like. . .
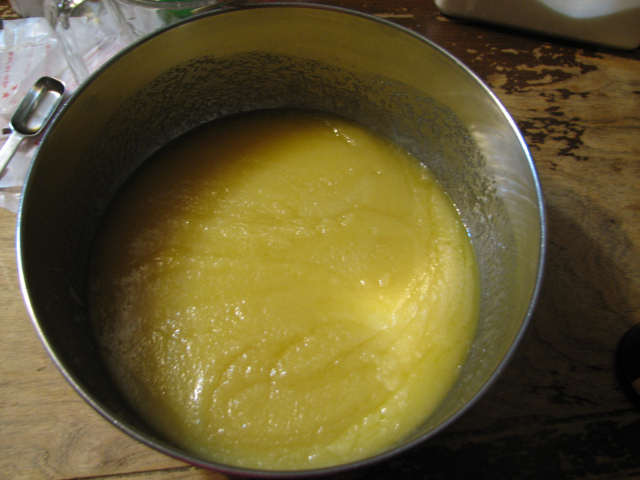
. . .applesauce!! Isn’t that funny?
I always think that’s funny.
It’s especially funny ’cause lots of low-fat brownie recipes use applesauce as a fat replacement. There, applesauce masqurades ad fat. Here, fat masqurades as applesauce. Tee-hee!
Nobody gets my sense of humor.
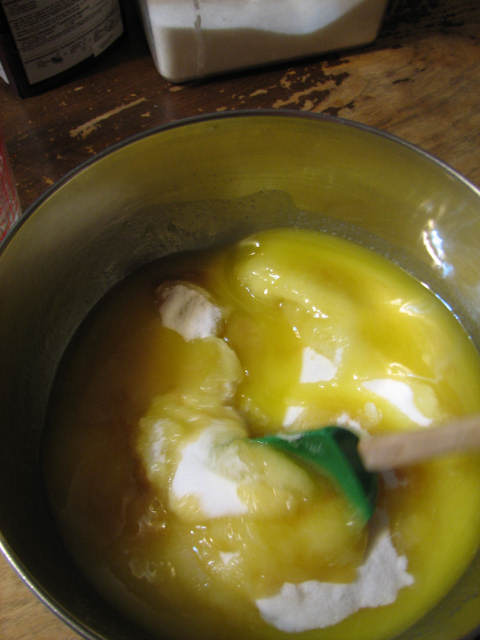
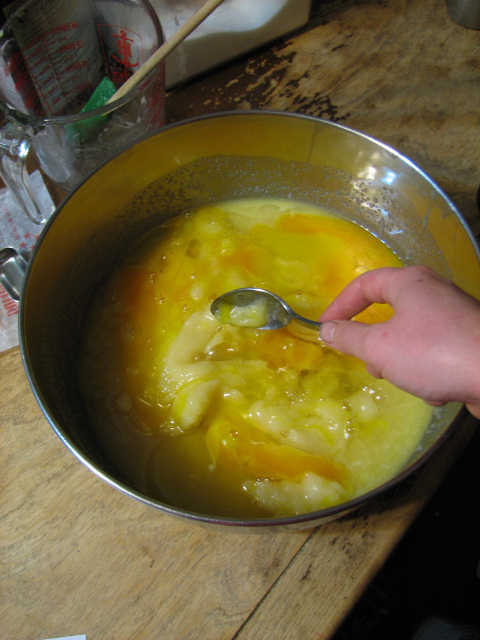
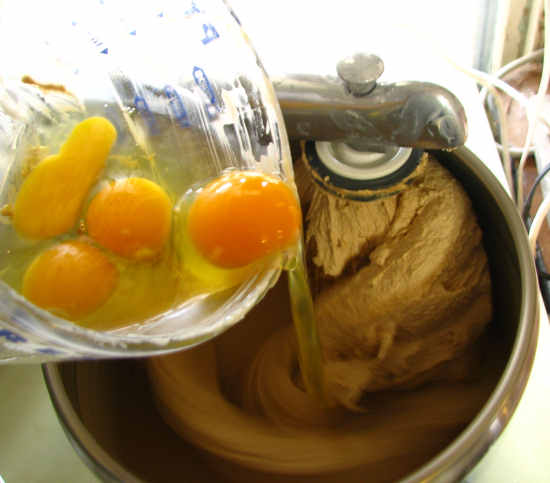
Now you have to add in your half-a-dozen eggs.
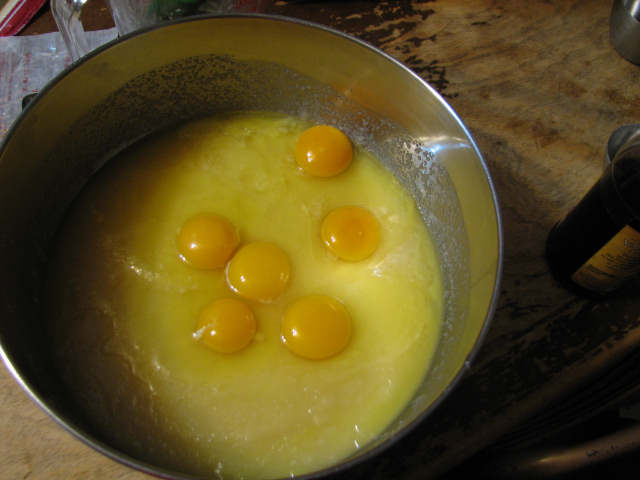
Mix it all together with sturdy spoon.
If you don’t have a sturdy spoon, get one. You need it like, um, like birds need feathers. You and they will have a much easier time of accomplishing what you need to do.
Actually, if you don’t have a sturdy spoon, you can use an electric mixer here. But later on in this recipe, YOU WILL NEED TO USE A SPOON! Brownies are allergic to overmixing. It doesn’t matter till we get the flour added in, but once that flour is wet, you must learn the meaning of gentle.
Even if you are a barbarian.
Okay, before we get any further in our mess-making, we need to attend to some other important matters.
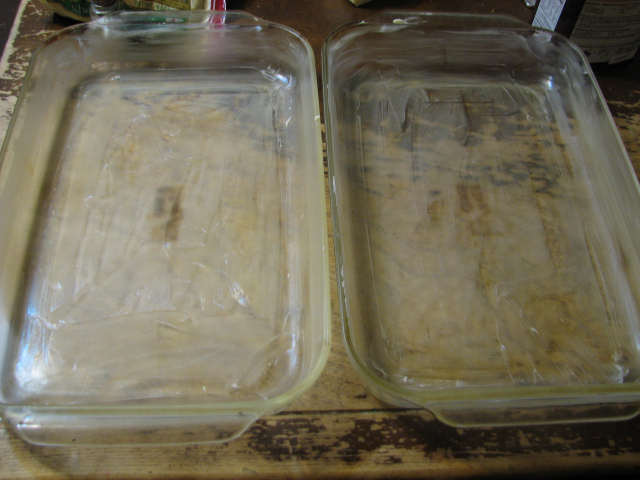
Like thoroughly greasing two 15×10 pans with lots of butter. No sissy baking spray. The real deal, man.
Another important matter is preheating the oven to 350.
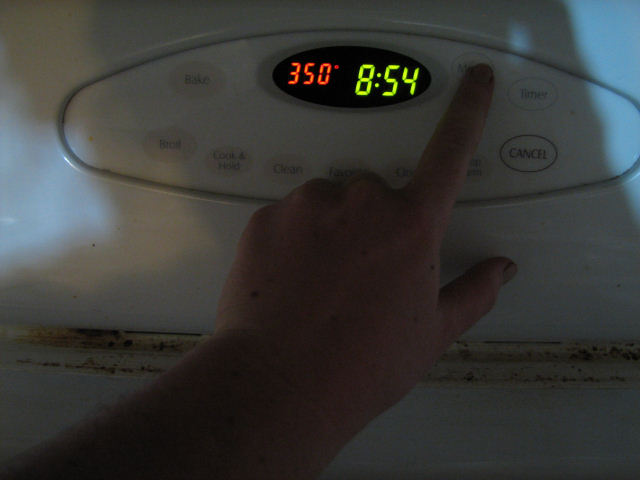
Guess what? It really is 8:54. PM. Isn’t that awful?
I mean, it was when I took the picture. It isn’t right now.
Actually, it wasn’t when I took that picture. I forgot. We set all of our clocks ahead by 15 or 20 minutes.
Because it’s funny, that’s why.
Why not?
It’s our own little safe, secure alternate universe. No one in the world is on the same time as us.
And then we have one clock set to real time, and then we always get confused when we’re talking about time.
“When you said we should leave by 9 o’clock, did you mean real-time, or kitchen-clock-time?”
So it was probably closer to 8:35.
Real time.
Anyway, I blame that as the reason why all my pictures were blurry this time. The barbarians would undoubtably say that I ought to make brownies all over again and take better pictures, but guess what? These pictures have been sitting on the hard drive for almost a year now. If I am ever going to educate this world to the secret of happiness, it’s now or never!!
(And, no, I did not have a sudden break-down need for brownies; the boys needed to take them to work for a party the next day. I’m sure there is some reasonable reason why I’m doing it sooooooo [kinda] late at night. Like maybe they forgot to tell me until they came home that evening. Or something. I don’t really remember, but neither do they, so I’m pretty sure I can make up whatever reality I want. So they didn’t tell me until 15 minutes previous sounds like a good reason to me.
I am pretty sure them taking my brownies to work is the only reason they are so popular and famous.
And I am pretty sure no one will argue with that, because guess what? Not arguing with that is a good way to get more brownies.)
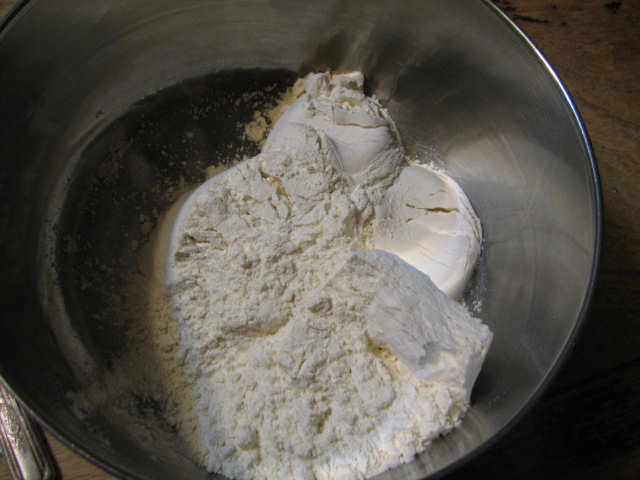
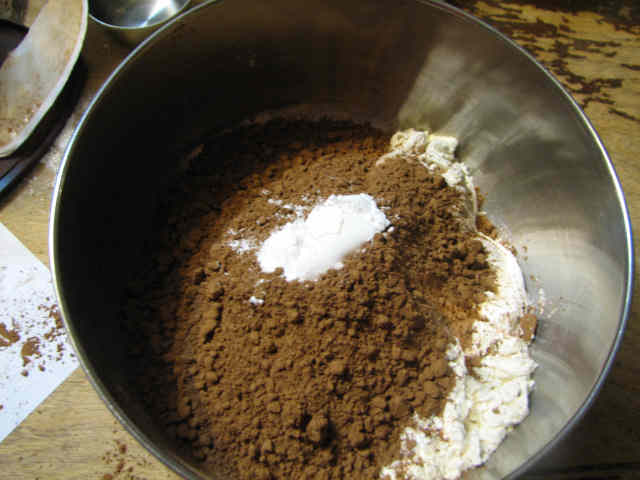
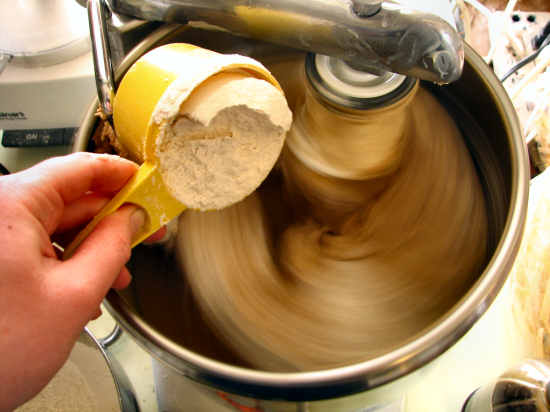
Now it’s time to mess with dry ingredients. In a seperate, smaller bowl, add your 2 2/3 cups of flour.
Now add the cocoa. 2 cups of it.

And you thought I didn’t believe in chocolate!! Hah!
The reason why we can get away with adding almost as much cocoa as flour without killing ourselves is because of this:
It’s all about balance, man. Yin and Yang. Harmony and love. All that good stuff. No, really!
I don’t know if you have ever noticed it before or not, but if you put a scant 1/8th of a teaspoon of cayene powder in a thin broth, it burns your throat going down. However, if you really load the cayene onto a piece of chicken, and that deep-fat fry it, it’s much more mild. Or if you put an 1/8th of a tsp. of cayene into a creamy-based sauce—you’ll find that a lot more mild than the 1/8th of a tsp. in a fatless broth. Fat has a reconciling effect on powerful flavors. If you put this much cocoa in a lowfat brownie, you will have trouble trying to figure out what the difference is between making brownies and skipping the fuss and bother and just eating cocoa out of the box. The same goes for the sugar.
All this butter makes the ingredients play nice. They’re just too harsh, otherwise. Too bossy, too overpowering. You should try it; if you know someone who is too harsh, too bossy or too overpowering, get them to eat these brownies. It’ll probably work.
As long as their mouths are full.
Anyway!
Add in your 1 1/2 teaspoons baking powder. 1 1/2 teaspoons is the same thing as half a tablespoon, did you know that?
Probably not. Most people don’t even make 1/2 tablespoon measurers any more. It’s like they don’t expect people to be using 1 1/2 tbl. of ingredients. What do they know?
Oh, yeah. Add a dash of salt.

People nowadays use too much salt. Name three places you can eat out (or three prepared processed packaged foods) whose predominate flavor is NOT salt. And then tell me, ’cause I can’t do it. Salt is good when used in moderation. Does anyone know what moderation even is any more?
Guess what, guys. I just put 5 1/3 sticks of SALTED butter in there. It doesn’t need a whole lot more salt.
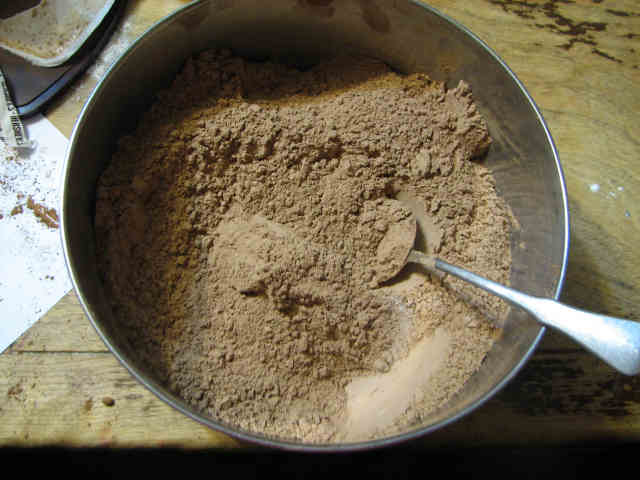
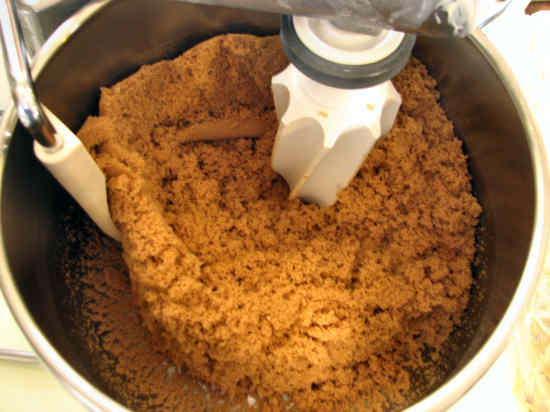
Mix the whole mess up:

Try to get your cocoa lumps out now, because you won’t have a second chance once we add the dry ingredients to wet ingredients. If you’re really worried about it, you can sift it. If you’re not, you can have little lumps of dry cocoa in your finished batter, and that’s okay. You won’t even be able to notice them in the finished brownie. The cocoa soaks up all that butter. . .
Anyway, this is what it looks like when I’m done stirring them together:
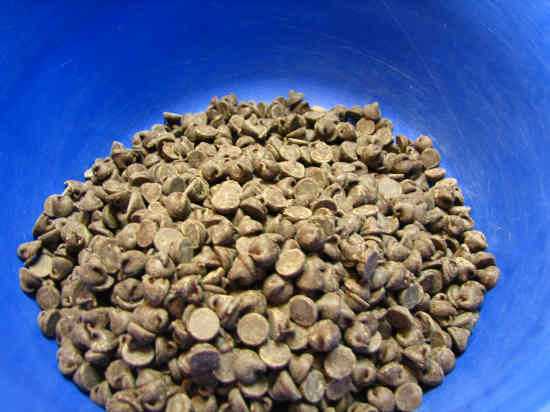
Now we have to chop the nuts. Even if you don’t believe in nuts.
Just kidding. These brownies are borderline miraculous even without nuts. They’re just even better with nuts. We use walnuts, because for the longest time they were the cheapest. Now, who knows? But our palate has already been trained to think that nuts in brownies = walnuts, so that’s what I do. Feel free to use pecans. Or almonds. Or peanuts. Or pistachios. Or even leave them out, I guess, but I think you’re really missing out.
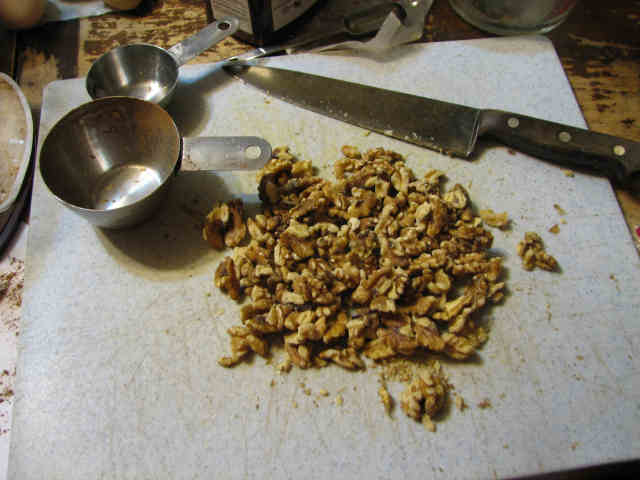
I chop them by hand, because that works best. No, really! If you try to use the food processor, you get big chunks and saw dust! And chopping them by hand is really very easy, and very fast.

This is what it looks like after I chop up 1 1/3 cups, and think, “There! I’m done.” Then I remember, “Oh, yeah, I’m making two 15×10 pans! I need to cut up twice this!”
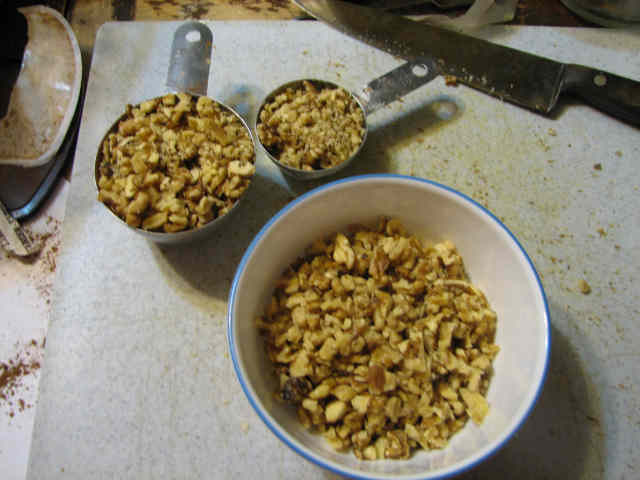
That’s better.
Yes, the picture is blurry and out of focus. It was after 9 o’clock at night, for goodness sakes. Besides, that camera hates me.
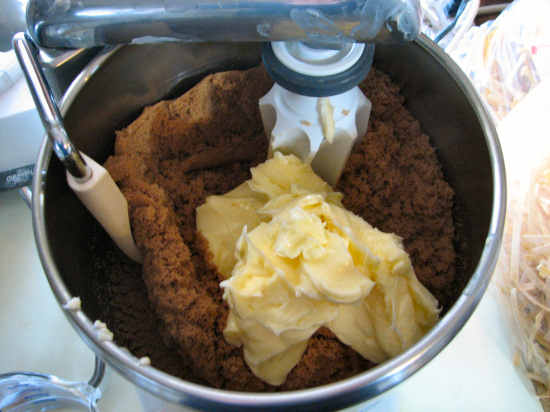
And now the magic begins! Behold, the marriage of wet and dry ingredients!
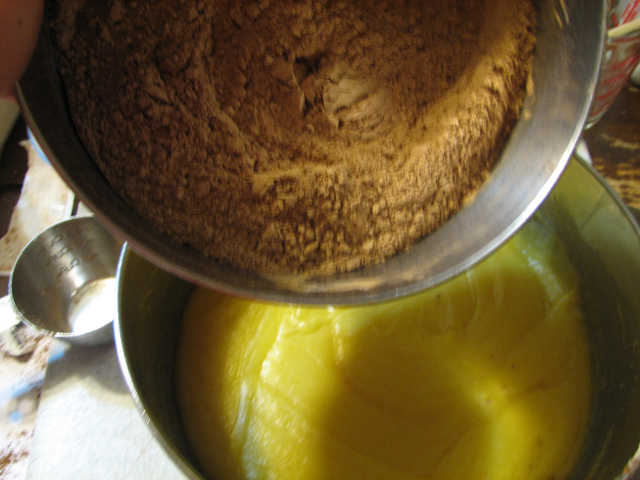
The Fleur de Lis continually protests “sugar” being counted as a wet ingredient.
This is the part where you MUST NOT USE AN ELECTRIC MIXER! YOU MUST USE A SPOON! Using an electric mixer at this point will help you acheive hockey pucks. Not slightly chewy, melt in your mouth brownies.

Stir gently. . .
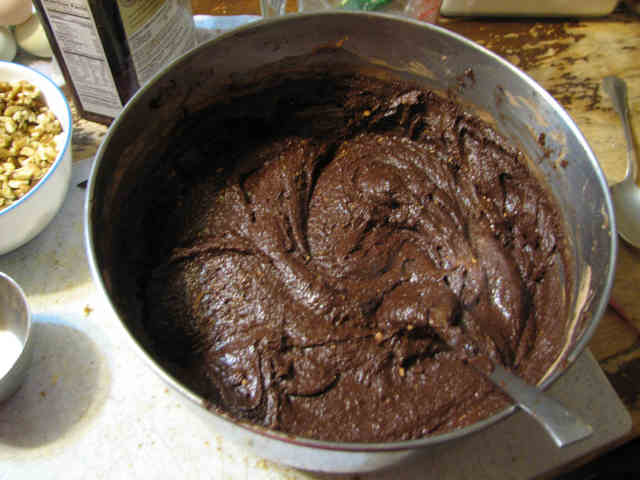
STOP!! That’s good enough! Yes, there are little lumplets of cocoa. Lumpettes. But we do not under any circumstance try to get them out now. If we keep stirring till we get them worked out, we will have doggy-chew toys. Remember that now: we’re making brownies, not doggy-chew toys.
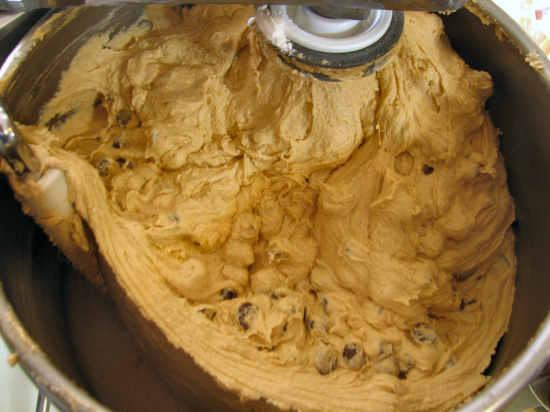
Now add the nuts:
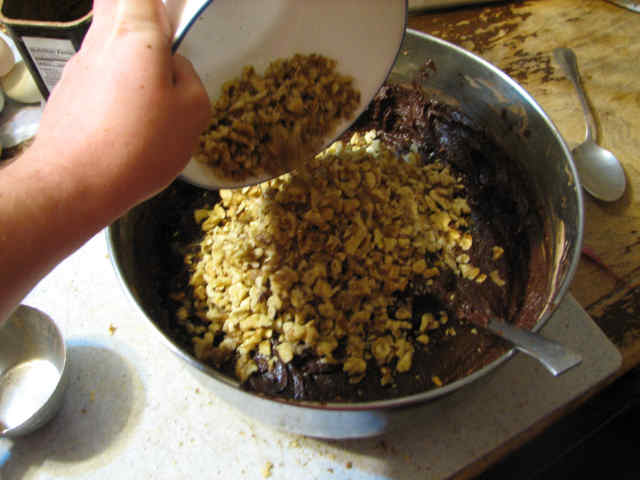
You may be wondering why we didn’t add the nuts back with the dry ingredients. After all, we’re supposed to be spending as little time as possible on the whole mixing deal, now that the wet has joined the dry. Problem is, if we add the nuts with the dry ingredients, the nuts like to protect little pockets of dry ingredients. So instead of biting into the brownie and—Oh! a walnut!, we get—Oh! a pocket of nasty-tasting baking powder. Not nice. So the nuts have to go in by themselves. But still. Don’t fuss too much about perfect distribution. Close enough is good enough.
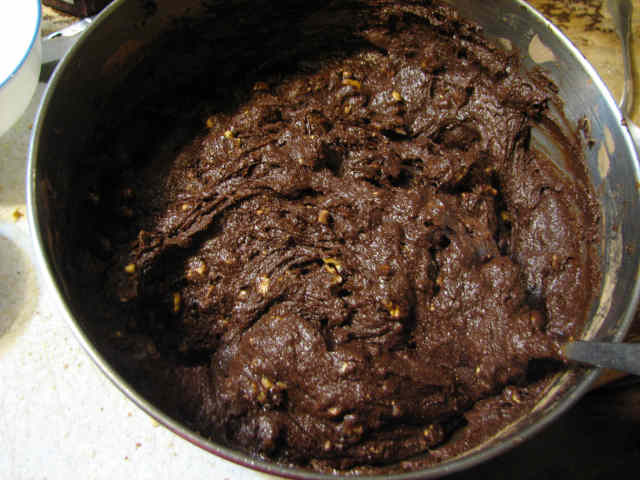
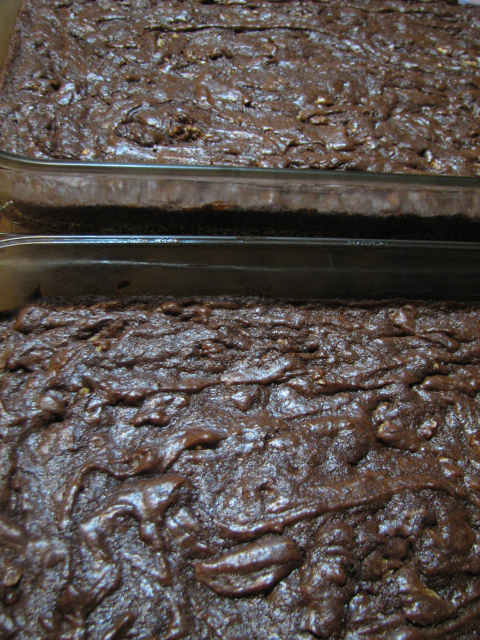
Then spread it in your two greased pans. . .
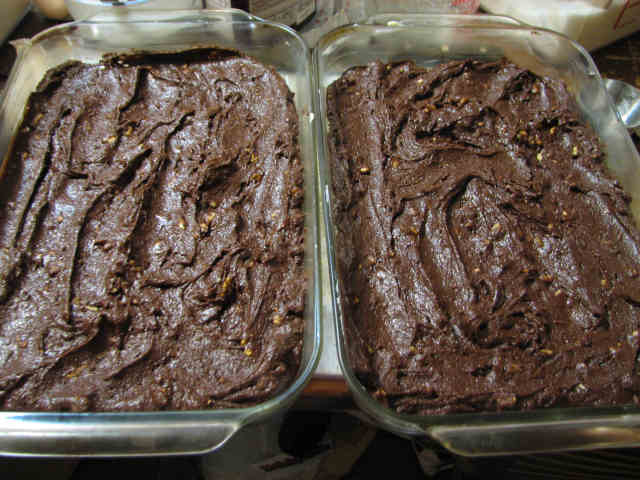
See how stiff it is? Don’t sweat it if yours is considerably looser. When you use so much butter, the consistancy of your batter is largely detirmined by the temperature in the room. Winter brownie batter is much stiffer than summer brownie batter, because the warm weather keeps the butter sooooft. But both summer and winter brownies are spectacular. After all, they both wind up in the oven.

Isn’t that lovely? What could possibly be more comforting than a glowing oven full of brownies?
They need to stay in there for about 25 minutes, but that’s just a ball-park number. When you have this much oven space taken up, you really need to switch things around half-way through, to keep one edge from being burned while the middle edge is still a little under-cooked.
You want the edge of the brownie to be firm and crispy, BUT NOT THE CENTER! These will continue to firm up once they’re out of the oven—as they say, if they’re done in the oven, they’re overdone. The top will be crisped over, but if you push on it, it will give way readily.
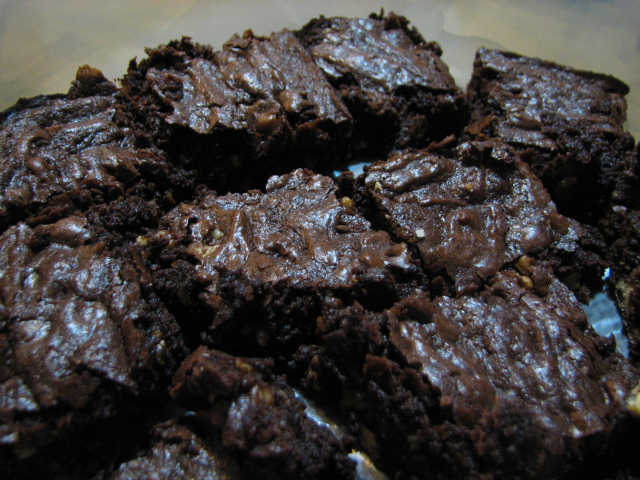
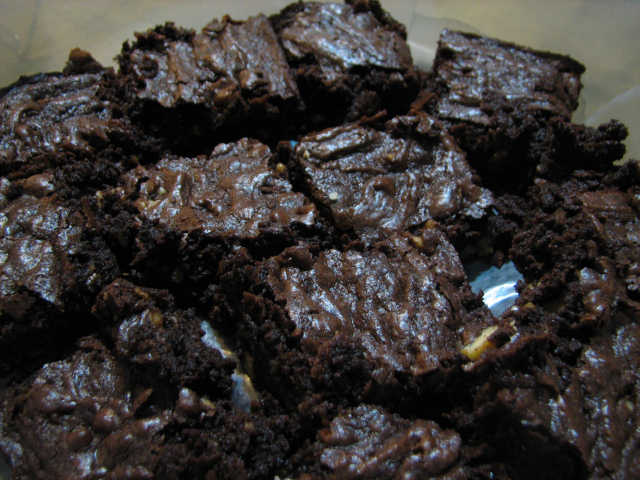
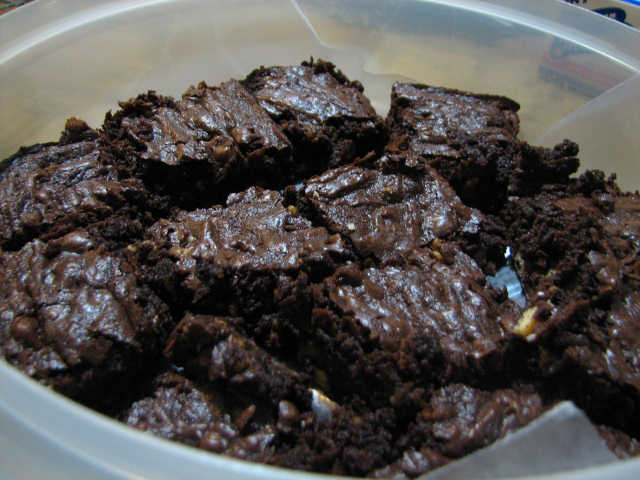
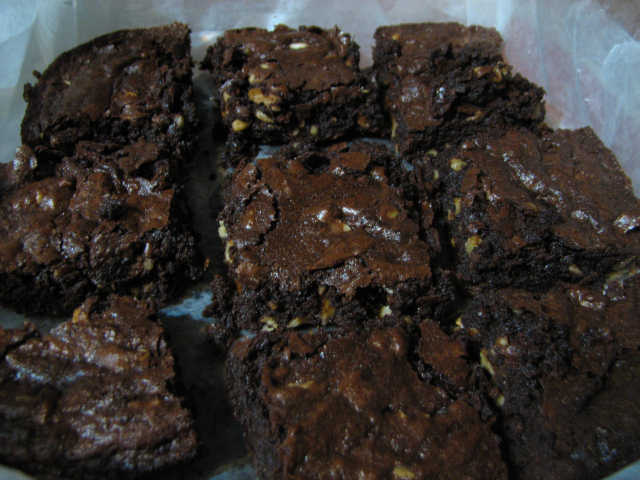
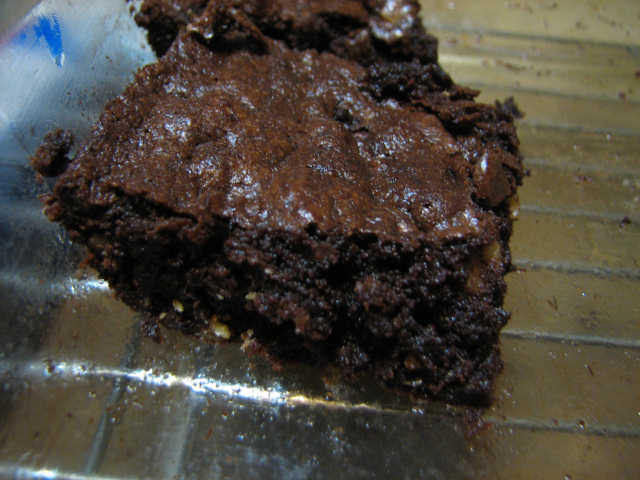
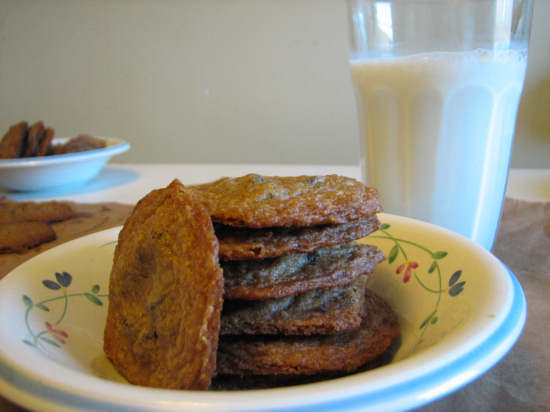
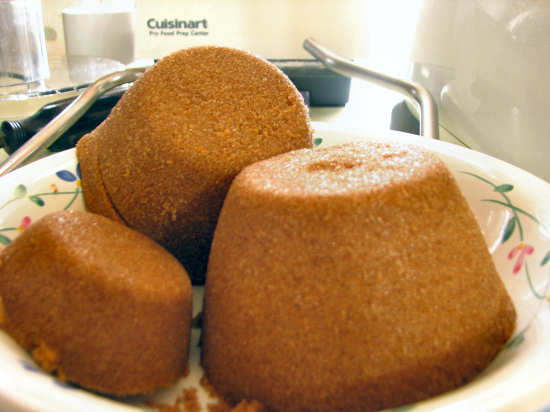
Basically, they should like this:
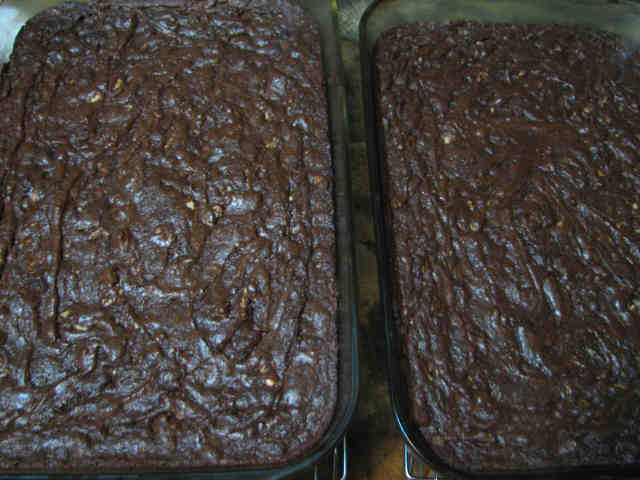
Or this:
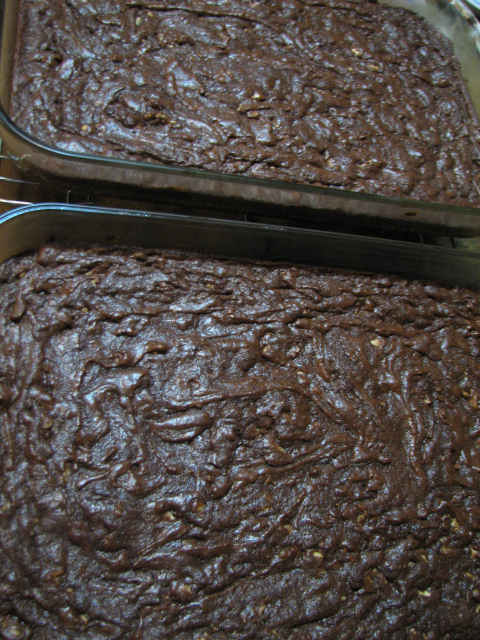
Or even this:
No matter which way you look at it, they still look good.
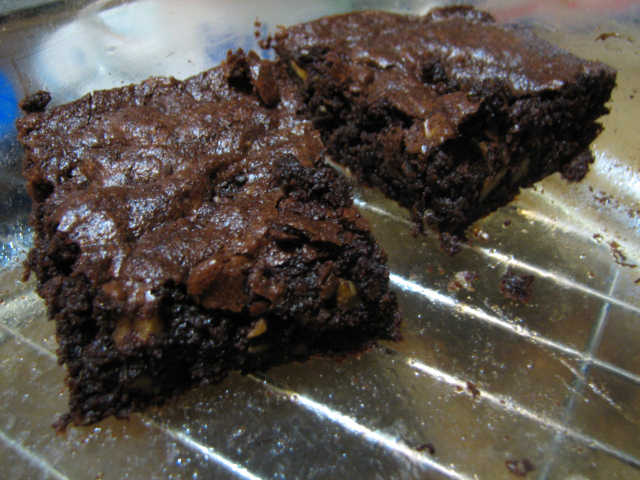
Technically, you should wait until they’re at room temperature before you cut them. Only problem: waiting.
Cooled, they well be just a touch more chewy, and hold themselves together well. Hot, they tend to fall apart.
I had to package them up for traveling before I went to bed, so I cut them while still strongly warm—not quite falling apart, but not as firm as they will be at complete cool down.
And did you know these brownies are prescription strength anti-depressants? Downside: very short lived. I think the depression comes back as soon as you finish eating the brownies. Upside? No one has ever reported suicidal thoughts while consuming these brownies.
Posted in Recipes | 1 Comment »
Though this is technically a non-meat meal, somehow it gets full pass from the barbarians. I think it’s because it has pasta in it, and though I’ve never quite understood the redeeming qualities of pasta, they appear to be quite powerful. (Barbarians will even eat fish if it’s a pasta sauce. I’ll have to share that one with you, sometime.)
But this is a barbarians meal in more ways than one. It is also easy enough that the barbarians can actually make it themselves! Yessiree, it’s a red-letter recipe.
This is the first recipe I train people to cook on. At as young as 3 or 4 years old, kids can begin helping, grating cheese or stirring the sauce. By the time they’re seven, they need supervision and some instruction, but can do most of it themselves. By the time they’re 9 or 10, they’ve basically got it down pat. They need help remembering the exact amount of flour and butter to use, and someone else to transport the 3 gallons of water from sink to stove, but they can be left pretty much on their own.
And by the time they’re 18 or 19, and they suddenly find themselves on their own (albeit even just for a few days), they can fall back on this recipe to survive. The Martlet discovered pasta in the pantry, and made this meal from memory. He even managed to scale the recipe down to one pound, which he found made a sufficient lunch and dinner—half at either meal. And trust me, if he can do it, you can too. Cook it, I mean. I don’t know about eating half a pound of it in one sitting. At any rate, it’s a recipe bachelor’s could survive upon, and it’s good, which, for a bachelor’s recipe, is pretty shocking.
And so, without further ado, here’s the cast of characters:
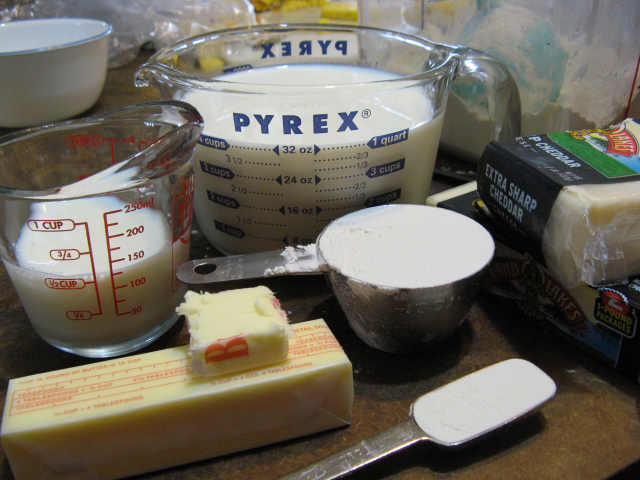
For the cheese sauce, you have:
1 stick + 1 TB butter
1/2 + 1 TB flour
4 1/2 cups milk
1 1/2 lbs. cheddar cheese (we like extra sharp)
Brilliant in it’s simplicity.
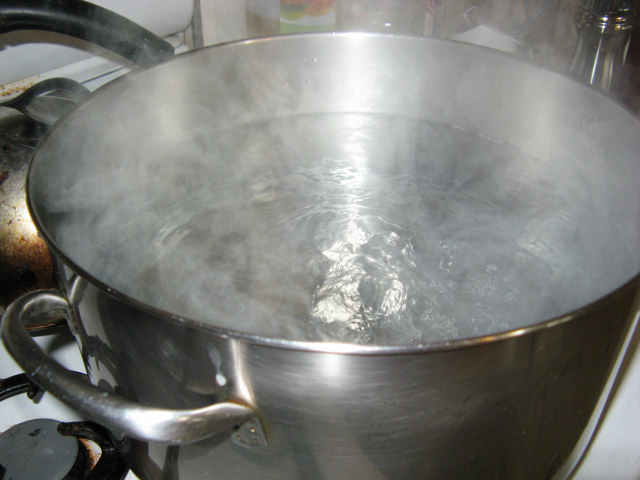
Once you’ve ascertained that you have the necessary ingredients to proceed, the first thing you’ll need to do is fill up a big pot with water. Preferable a 3-gallon pot. This is how you do it:
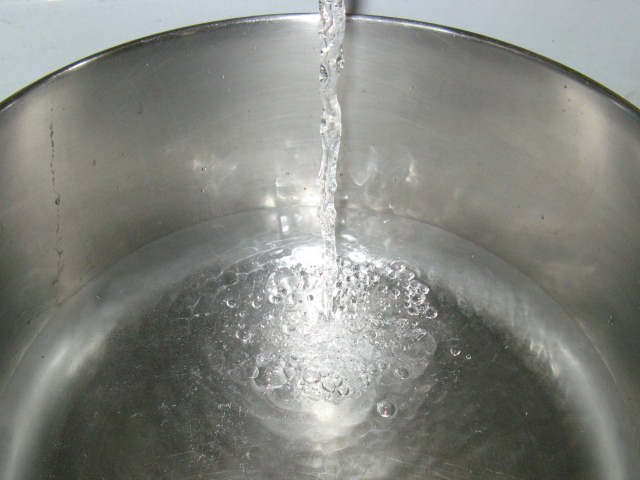
Then you realize taking pictures of water is fun. Look, I can catch the ripples of a water drop on camera!

Look at the reflections in the water!
Then you realize that everyone else is probably bored out of their minds to be looking at regular old water, and will probably hate you for taking up so much of their bandwidth with totally unhelpful pictures, so you throw the pot of water on the stove. Not literally. Just like this:
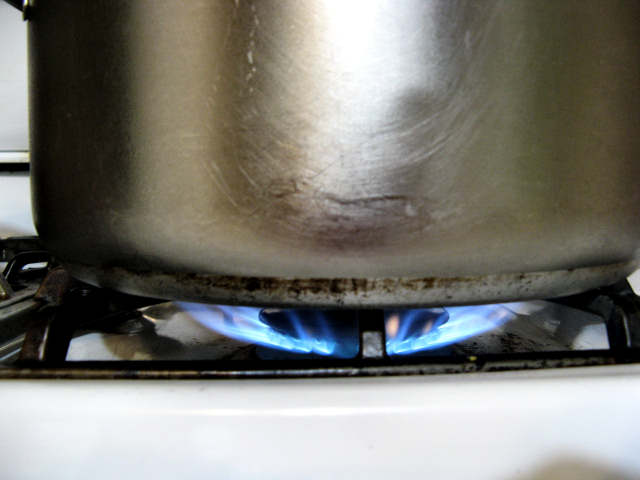
Only take a quick look, and then ignore it. Because a watched pot never boils, and it takes long enough for 3 gallons of water to come to a boil as it is. Even with a super-hot stove. Oh, and put a lid on it, too. It’ll take 60 million years longer without a lid.
Next, throw your butter in a pan and melt it:
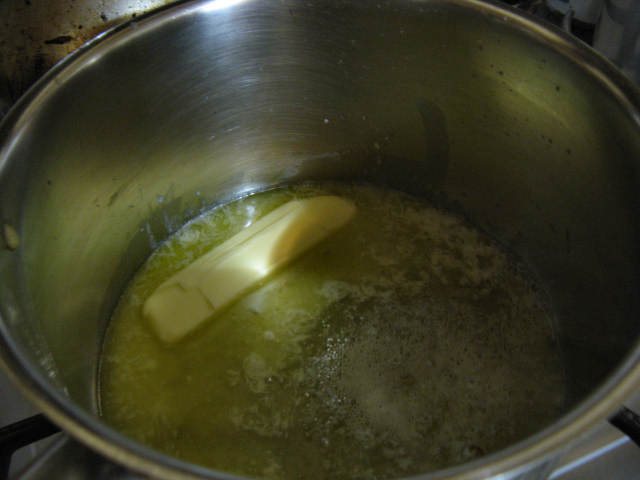
Yes, you do have to throw it. I don’t go quite as far as the Barbarians and say that there are only two temperatures, off and high, but I do think it’s impossible to make lunch for a horde of hungry barbarians and gently and slowly place a stick of butter in the pan. Just chuck it in there.
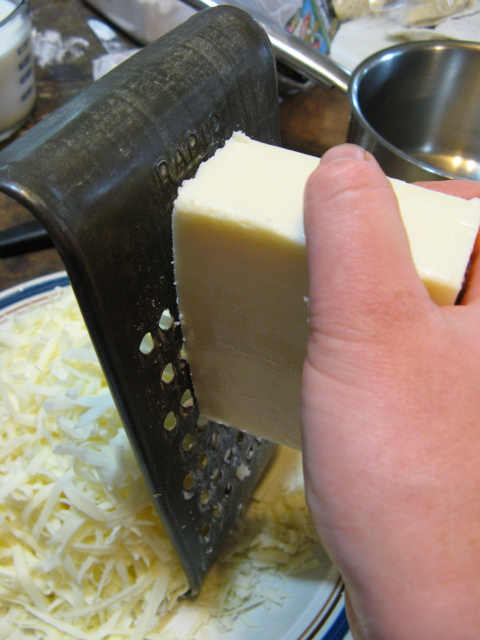
Much to the horror of the barbarians, I actually have the heat on low, because while the butter is melting I grate the cheese.
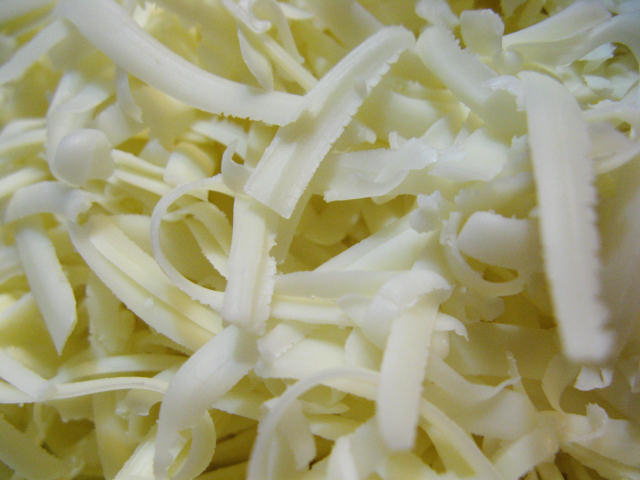
And, to their further and continued horror, I grate it by hand instead of the food processor. It makes less dishes. And it’s quieter. And you know what? There’s usually enough ruckus going on without making some more of my own.
And, which would probably make them border on outrage, I get all artsy-fartsy with the camera instead of hurrying up and feeding them already!
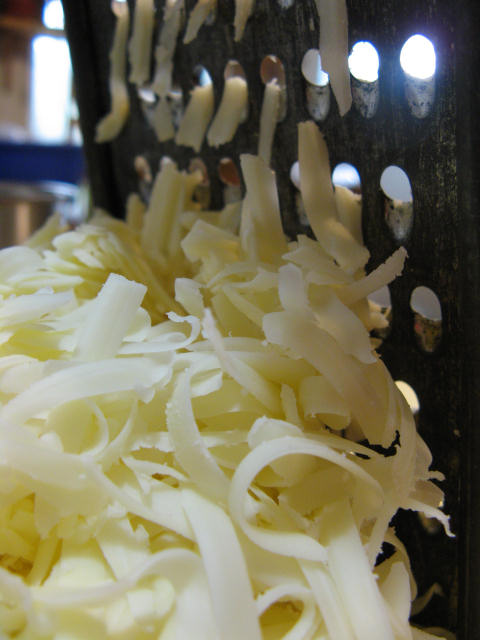
Ok, all done tormenting people. Except maybe for those who are getting sick of cheese pictures. This is what 1 1/2 lbs. of cheese looks like after it’s been grated. By hand.

By now, your butter is probably thoroughly melted, and in great need of attendance. Dump in your flour:
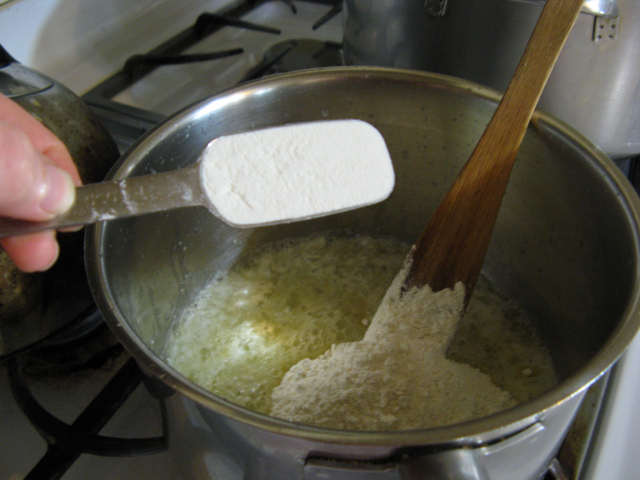
Since the light shines from behind me, it casts everything on the stove into shadow, and makes it really hard to take pictures. A flash washes everything out. Maybe I should use a flashlight.
Stir it all together and let it get nice and bubbly. I let it cook for a minute or two after it’s all mixed together.
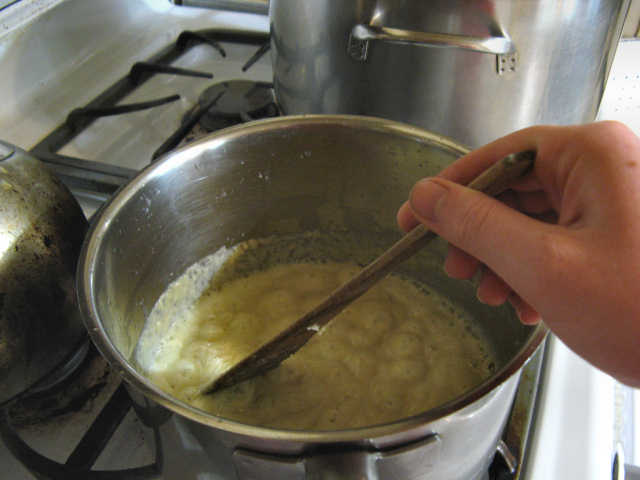
Here’s a closer-upper picture. If I remember correctly, I cheated and lightened it in a photo program.
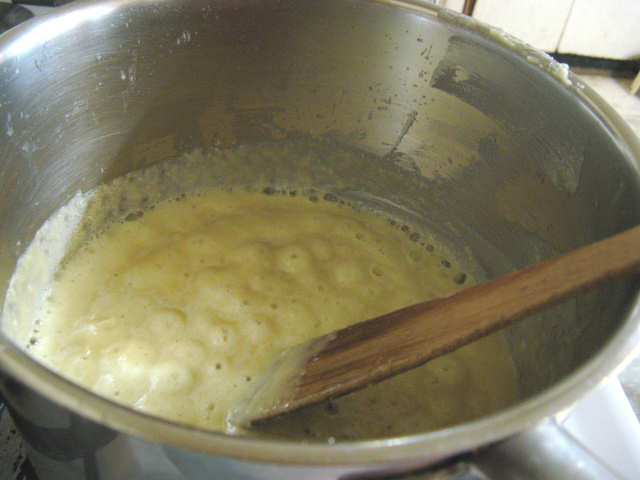
Nextly, you need to add in the milk.

Traditionally, you’re usually told to pour in the milk slowly, stirring constantly. But actually, I have a higher likelihood of getting lumps that way. I just dump it all in at once. At first, you’ll freak out and think you have lumps:

But really, the coldness of the milk has just made the butter harden, and when it warms up, you’ll have a thick, lump-free white-sauce. My take on it is that the butter coats the flour—when the flour binds to flour in the beginning, you get lumps. If you add the milk slowly, you can “rinse” the butter off the flour, and the flour will bind to itself. If you dump it in all at once, the butter “freezes up” around the flour, and when it melts again, it releases the flour evenly into the milk. So no lumps. (I used the flash here. My kitchen isn’t really that dark, honest.)
Just keep stirring that sauce. If you’re a barbarian, you’ll have the heat as high as it can go. If you have a helper, you can do that. If you don’t you, probably want the heat on medium, and you’ll have to keep stirring it in between the following steps.
You need to put a strainer in your sink:
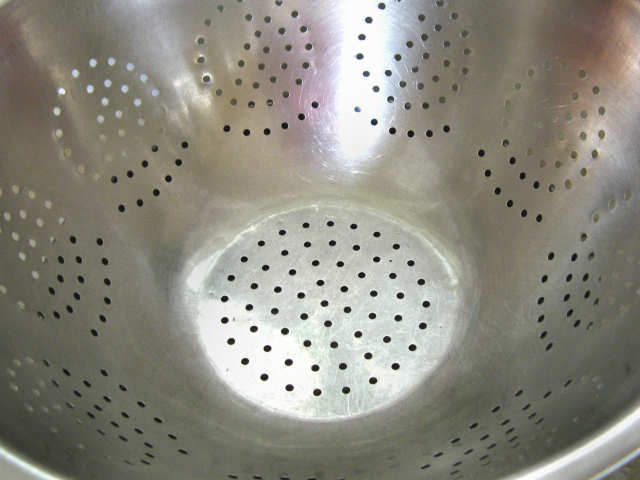
It better be a big one, because you’re going to pour 3 lbs. of cooked pasta into it.

Here I am playing Jackson Pollock:

Here I am enlargening to show texture, which, as everyone knows, is an crucial to telling people what your food is like.
You’re bored out of your mind, aren’t you? Don’t forget to stir the white sauce.
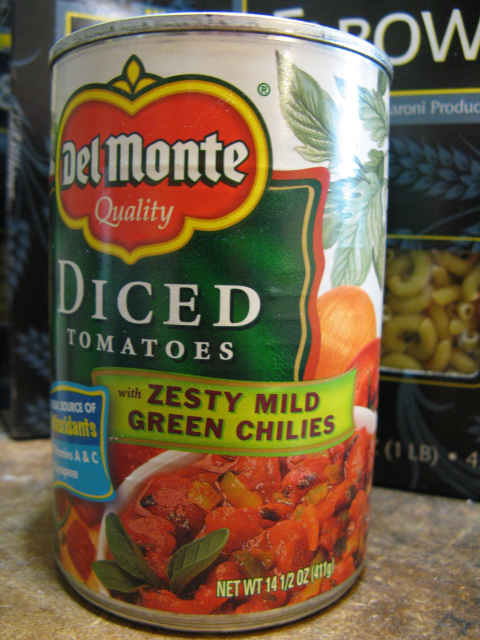
In the strictest sense, this next part isn’t part of making Macaroni and Cheese, but if you don’t do it, you stand in danger of being lynched by an angry mob. Or at least tarred and feathered.
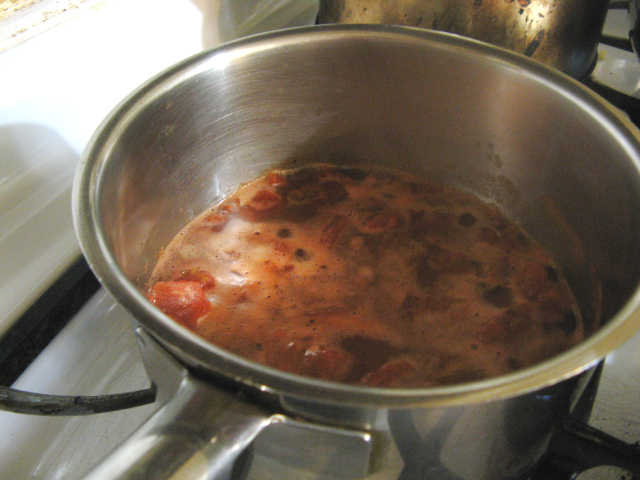
You need to heat up some spicy tomatoes for people to ladle over their macaroni and cheese. You can use your favorite kind. We used to use “Mexican Stewed Tomatoes”, but that was discontinued. Now we use either tomatoes with jalapeños or green chiles, or a can of each.
Ta-da!
Let’s take a closer look:

And a closer look. . .this one’s kind of Pollock-y, too, isn’t it?

Enlargened to show texture. Ewww, gross!

Look, it’s boring making something I’ve had memorized since I was nine. And it’s boring taking pictures of such mundane things, and it’s boring getting all the pictures ready for the internet. I amuse myself where I can.
Dump your tomatoes in a pan, like so:
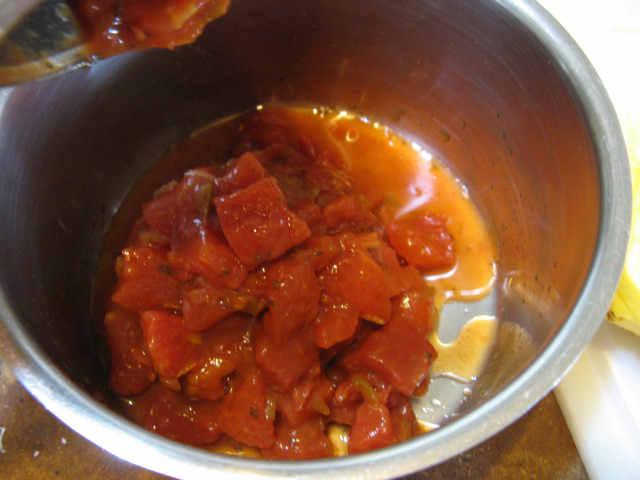
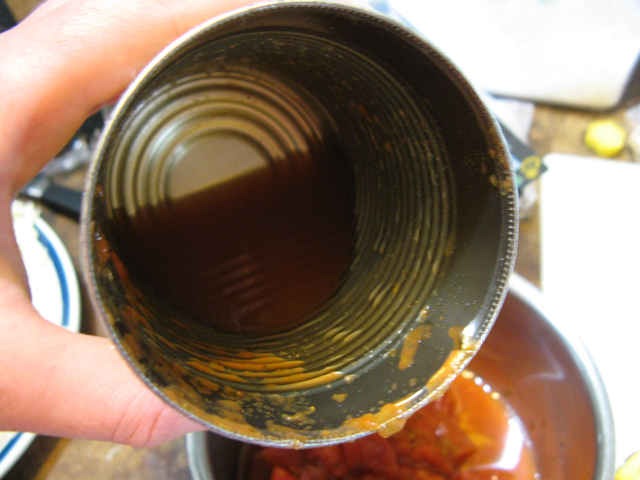
Some of us think the squishy tomatoes are a really gross texture, even if we like the flavor. So we scoop up the juice and leave the tomatoes behind. But then there isn’t enough juice to go around. So I rinse out the can with a little bit of water, which gives me the last bit of flavor in the can and more liquid in the pot.
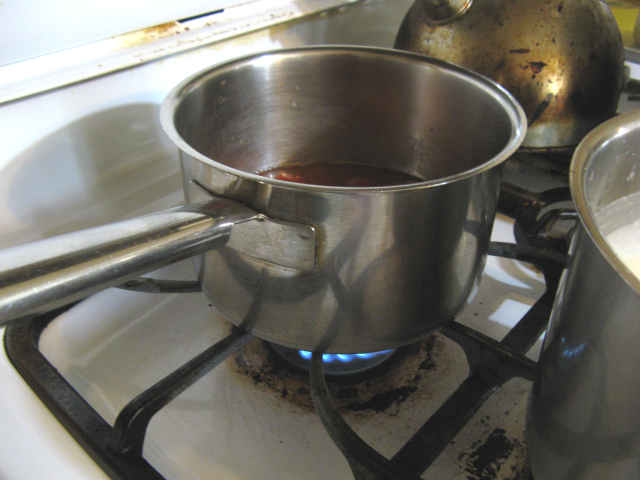
Put that whole mess on the stove, too.
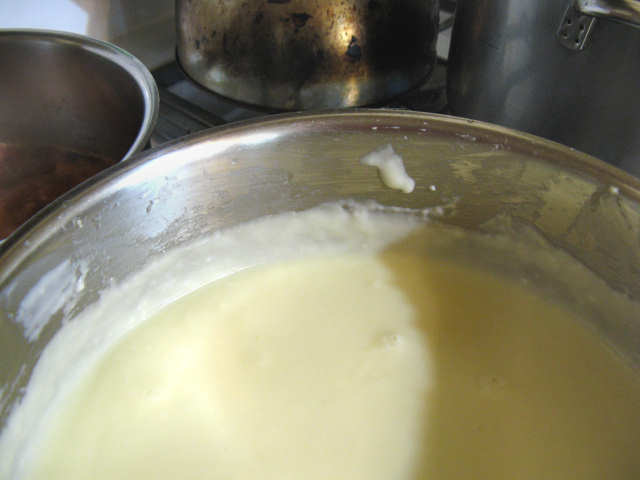
By now, your white sauce is probably getting all thick and bubbly.

Isn’t that a horrible picture? Almost not even worth posting.
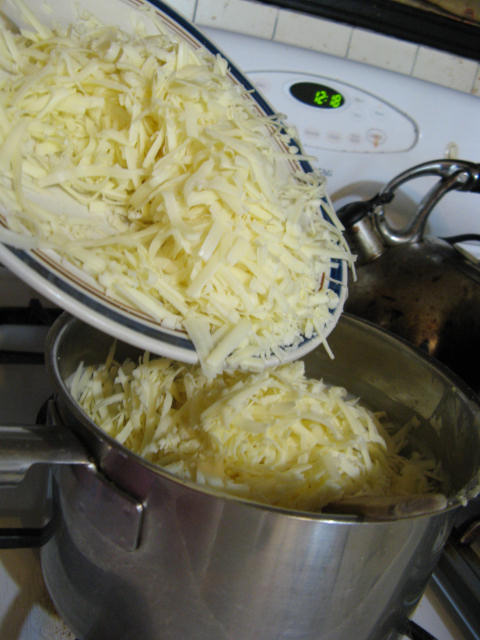
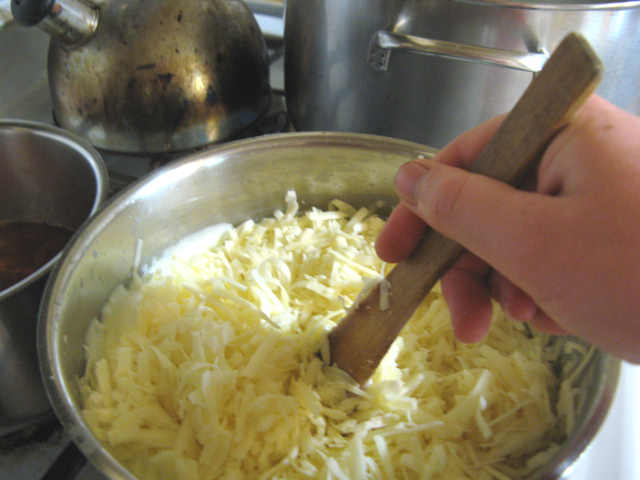
Now add in your grated cheese:
Stir it in. . .
. . .keep stirring. . .
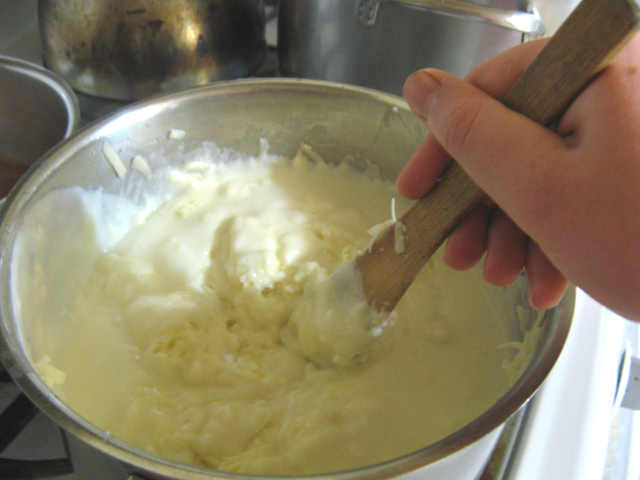
. . .and stirring. . .
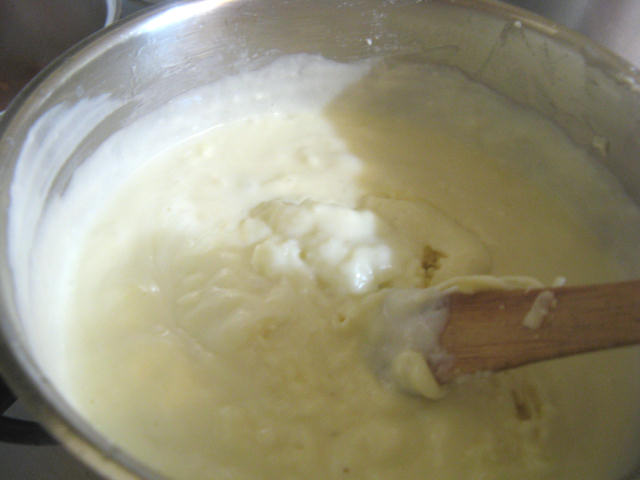
. . .Okey-dokey, your cheese sauce is finished!
Probably at this point, the water is boiling furiously, like this:
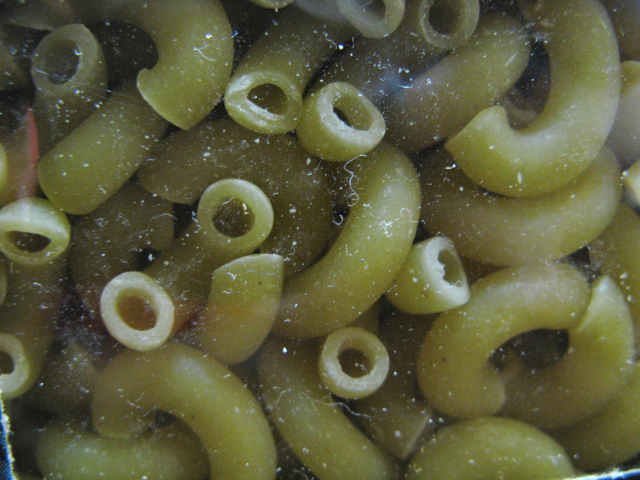
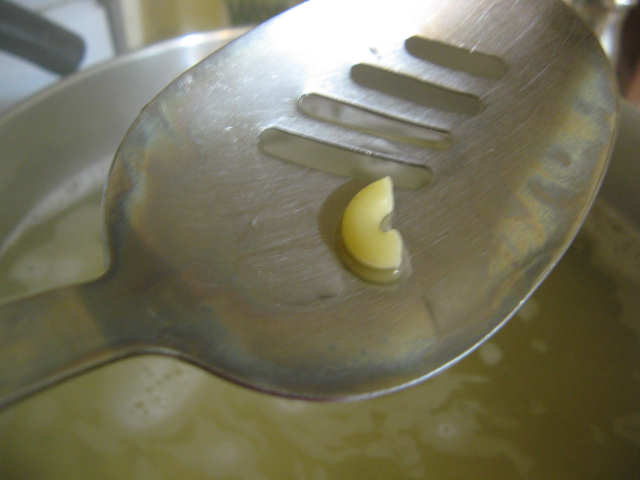
So then you need to add in your three pounds of pasta, like this:
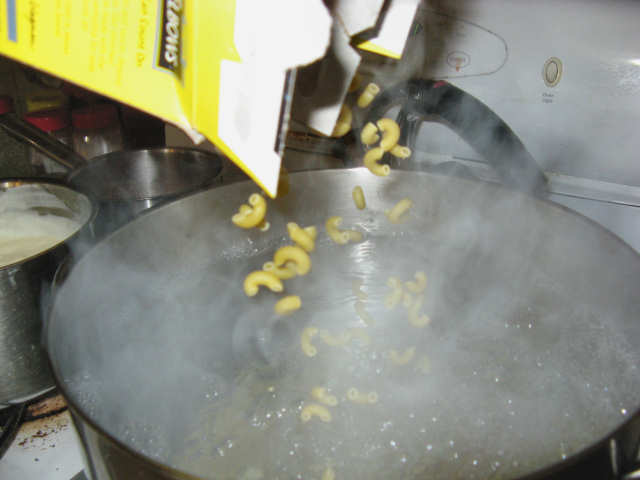
These are elbows, but you can actually use any shape you like. The Martlet and some others much prefer spaghetti, which I think is kind of gross. I like shells, but the Cross Moline thinks that’s gross, because it “holds too much of the cheesy sauce”. I don’t think that’s possible, myself.
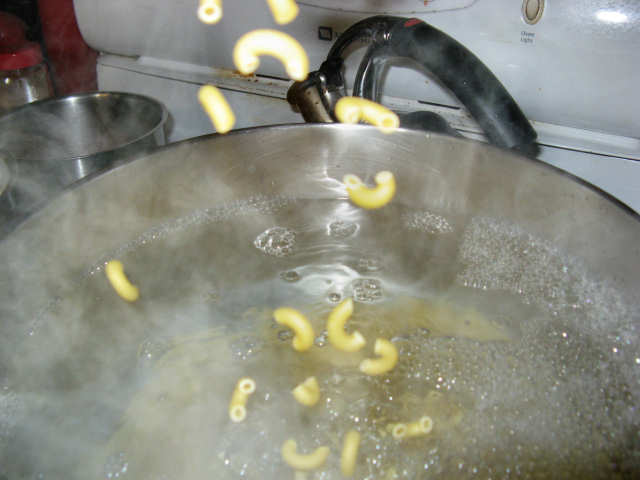
Make sure you stir the pasta, or it will all stick together and fuse into a solid piece.
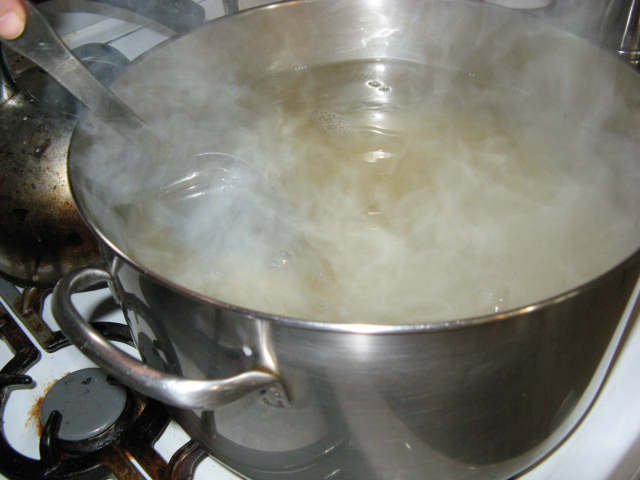
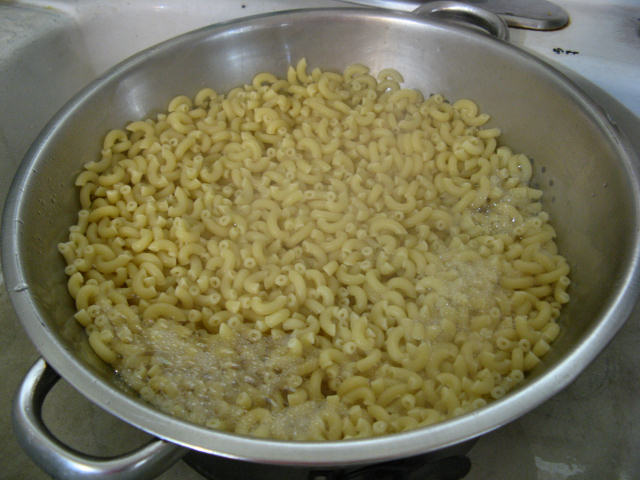
When the pasta stops feeling so hard and solid against your spoon, you have to start fishing pieces out to see if it’s done. When it is, it’ll look like this,
which isn’t very informative. You want the pasta to be totally non-crunchy, but not anywhere near squishy or soggy. Chewy is about what you’re going for, and it’s what some people refer to as al dente. (Which means “to the tooth” and makes no sense at all, unless you’re Italian.)
When it is done, dump it in your strainer, like so:
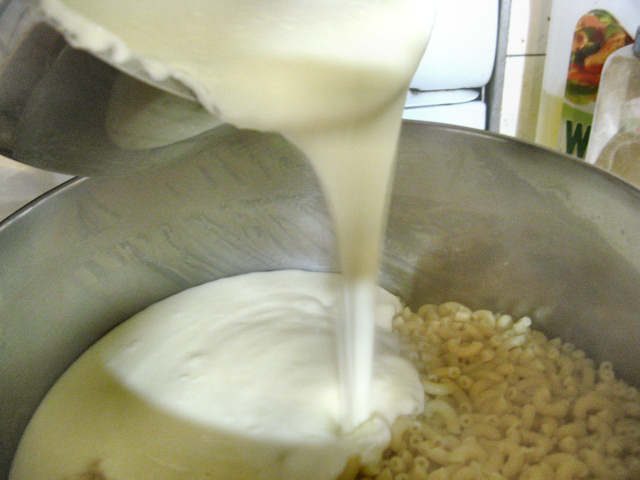
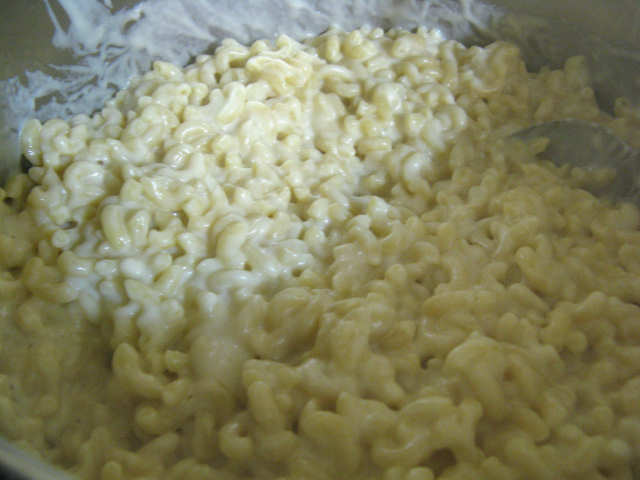
Then dump the pasta back into the empty pot,

and pour the cheese sauce over it.
Then stir

and stir
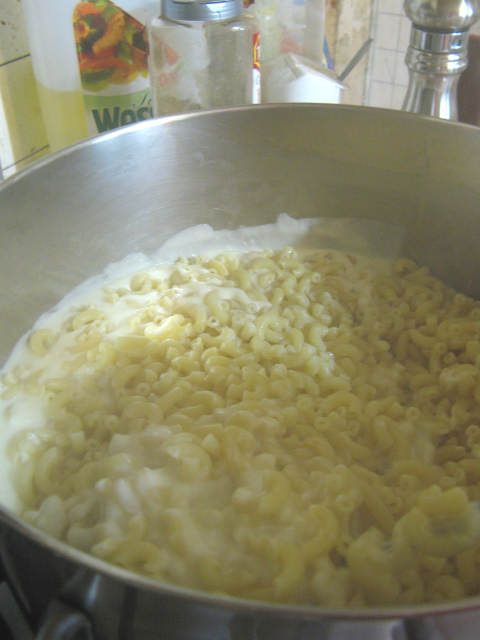
and you’re done.
By this point, your tomatoes should be hot, too.
So now you can call all your barbarians, and tell them the most wonderful meal of their lives is about to commence, so come eat. Don’t worry about being held to that claim, because all they will hear is “Food”.
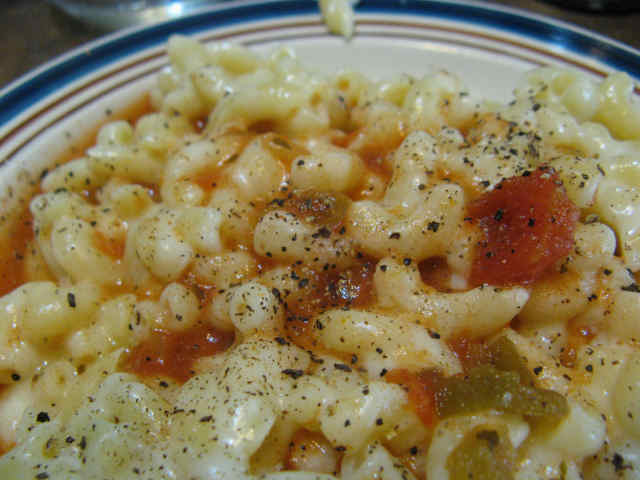
Here’s what it looks like plain:

Here’s what it looks like with tomatoes and freshly ground pepper:
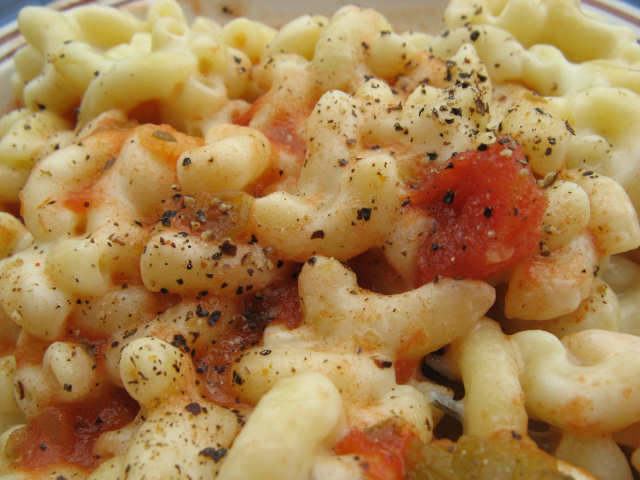
Here’s what it looks like enlarged to show texture:
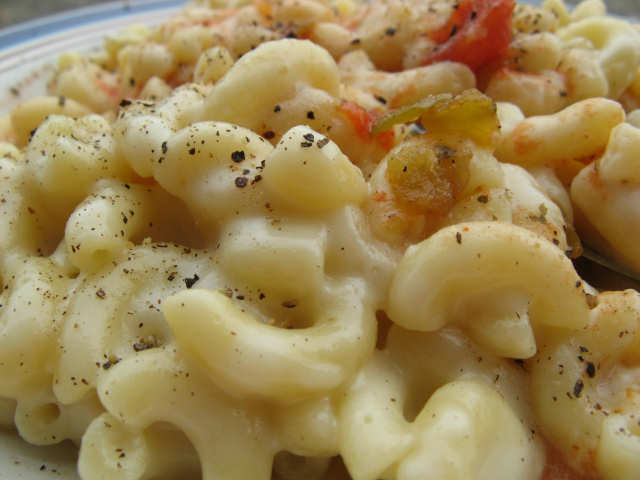
Food. Can’t beat that.
Posted in Recipes | 2 Comments »
Here we are, back to our regularly scheduled program: food. Mostly dessert. Not because I mostly make dessert (much to the great disappointment of the horde), but because it takes a looooooonnnnng time to take all those pictures. The barbarians generally know that they are lucky to be getting dessert at any time, so they’ll take it when they can get it. But they believe they are entitled to regular meals. “Regular” and “take lots of pictures” is pretty hard to get going at the same time.
This is a recipe we originally found in a, believe it or not, Consumer’s Reports magazine, and they’re they one’s who named it “Practically Perfect Chocolate Chip Cookies”. I’m usually against calling recipes “the best” or “the perfect”, because usually everyone has different ideas on what things are supposed to be like. But in this case, I would have dropped the “practically”. In my very completely and totally humble opinion, the ingredients are at a perfect balance. But I do admit that a large part of getting them truly perfect is baking them to the exact right point. You don’t want them under or over cooked by even a few minutes. But if you learn what a perfectly cooked chocolate chip cookie looks like, and you watch them like a bunch of vultures over road-kill, this recipe makes a perfect chocolate chip cookie—A cookie that is crispy and crunchy on the edges, and soft and chewy in the middle. A cookie that’s so tempting, my mouth kept watering as I tried to sort through the over 100 pictures I had taken.
A cookie that’s so good, it’s almost bad. Almost. But not quite. How can anything that leaves the brown paper looking like this be bad for you?

How can anything that uses this much butter be bad for you??
A cookie that’s so good, I think everyone should have some before they die. I told that to the Martlet, and he said “You think so, huh?”
“Well, I don’t think they need to be eating them on their death bed or anything, but everyone ought to know what a real chocolate chip cookie tastes like.”
“You think so, huh?” He clearly thinks this is a bad idea. I pause and reflect for a moment.
“You think it’s a bad idea to let anyone else have any, don’t you?”
“Well, yeah, this whole sharing idea sounds like something a girl would come up with!”
The ultimate incredulity. But rather obvious, really. Of course I am a girl—Why else would I go and make 200 chocolate chip cookies for absolutely no reason at all? That’s how many cookies this recipe makes, by the way.
It’s enough to keep your entire office party eating cookies for days, or enough for a houseful of barbarians to devour in a scant 24 hours and still complain you didn’t make enough. Though, after the first seven cookies, even barbarians concede a glass of milk is called for.
You will need:
6 3/4 cups flour
1 tbl. baking soda
1 tbl. salt
2 1/4 cups white granulated sugar
2 14 cups dark brown sugar
3 cups (6 sticks) butter, softened
1 tbl. vanilla
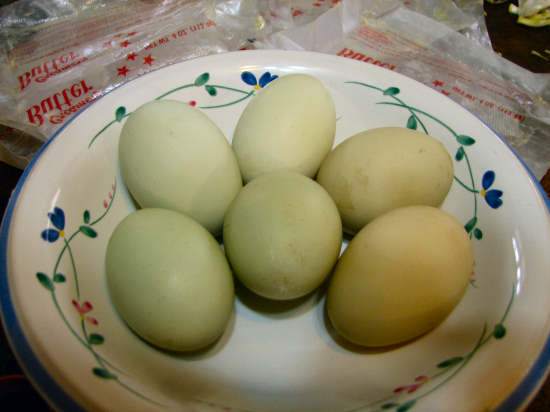
6 eggs, at room temperature
3 12 oz. packages chocolate chips (or, if you buy them in bulk like we do, 36 oz, that is 2 1/4 lbs.)
Get out your butter and eggs to warm up. I usually still have to microwave soften the butter. Maybe the house isn’t warm enough; maybe I’m just impatient. Maybe I usually forget to take it out.
I’m not 100% certain why the eggs are supposed to be at room temperature. I think it’s because eggs beat better when they’re not cold. But in a pinch I have (1) put the uncracked eggs in a bowl of warm water to warm them up, or (2) used cold eggs. (Shocking. Horrifying. And all that.)
Next all the dry ingredients need to be mixed together. Remember to measure the baking soda into your hand, and push all the lumps out with your fingers.
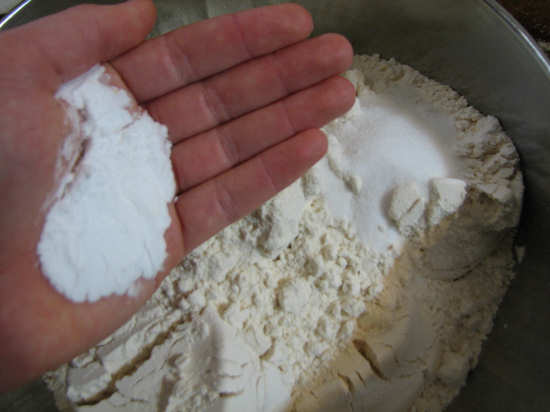
Mix the flour, soda and salt in a bowl. Set aside.

Preheat the oven to 375, and pack your brown sugar.
Measure your white sugar.
Dump both sugars in to the super-duper huge mixer. Trust me, nothing short of a super-duper huge mixer can handle this much batter. If you don’t have a super-duper huge mixer, you’ll need to at least halve this recipe. The batter won’t fit in a smaller stand-mixer bowl, and if you try to use a hand mixer on it, you’ll kill your mixer and, even worse, you’ll over-beat the mixture.
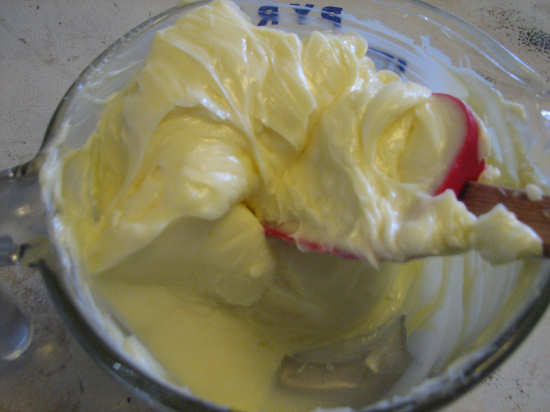
Then you add in all your butter,
and beat the mix till it’s pale, light, and very fluffy.

Add the vanilla and mix that in.
Add the eggs, one at a time, and mix them in. Basically, you beat this whole mix as much as you want (it just whips in more air) until you add the flour. Once you add the flour, you want to be very delicate, because the more you beat it, the more you will develop the gluten in the flour, the tougher your cookies will be.
After you add in the all the eggs, the batter will still be very light and creamy.
Then you add in the dry ingredients, about a half a cup at a time. Make sure you’re mixing at a slow speed.
This is what the batter looks like at this point:
Then the best part: the chocolate chips!
We buy them in bulk, so I have to weigh them out.

Mix them in, but just barely. You don’t want to overwork the batter at this point. Careful, careful!
Okay, now it’s time to make cookies. Which scoop is better to use?
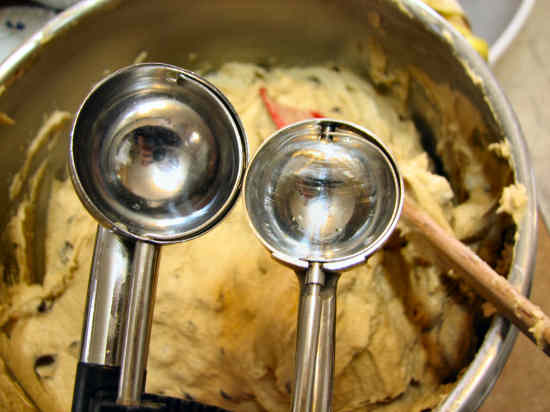
The bigger one? No, you foolish barbarian. A bigger scoop does not magically multiply the batter; it’s still going to be the same amount. And if you use the bigger scoop, the edges of the cookie will start over-baking before the center is finished. So use the smaller scoop for a larger number of perfect cookies, rather than the larger scoop for a smaller number of huge-but-not-perfect cookies. In case you’re wondering, the bigger scoop is supposed to be a meatball scoop. The smaller scoop is supposed to be a cookie scoop. Trust me, they knew what they were doing when they made it that size.
Uncookies waiting to go in the oven (these ones are really kinda too close together; see below).
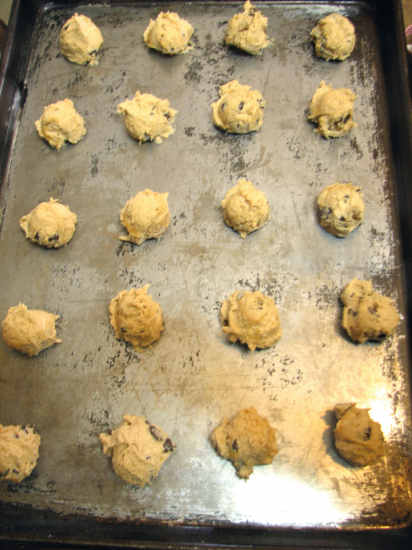
Use the thickest cookie sheets you can find, but scorn “air-insulated” sheets. I’ve never been satisfied with their performance. Light cookie sheets will cook the cookies a little slower, dark sheets a little faster. If you put two sheets in the oven at the same time, the one on the bottom will get it’s cookie bottoms cooked faster, and the one on the top will get it cookie tops cooked faster. You really need to switch them half-way through, or else half of your cookies will be burned on the bottom, and the other half burned on the top. I check them after about 7 minutes, but they can take up to 11 minutes or maybe possibly more.
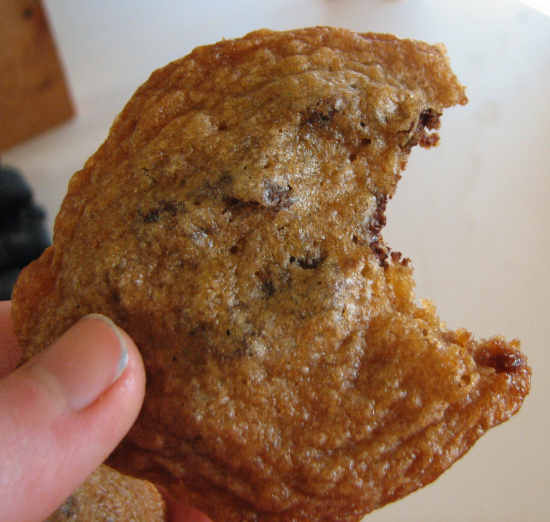
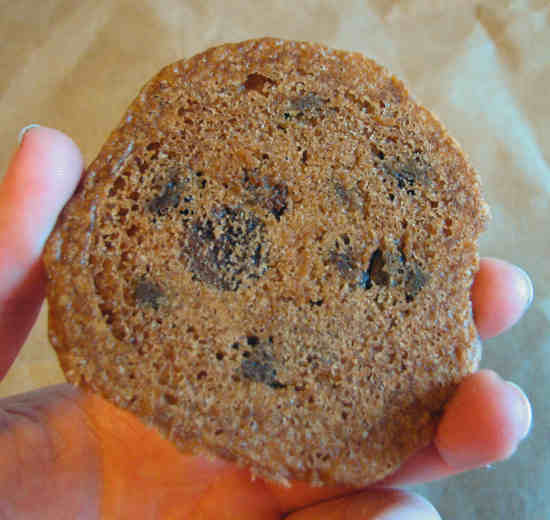
My camera kept lying, lying, lying about the colors. On one setting, it took so much color out of everything it was bordering on grayscale. On another set, I got a lot of color—almost too much, really. So then I tried to get the right color in Paintshop, and I’m still not sure it’s right. So, here’s a verbal description of when the cookies are done. Don’t cook the cookies until they are evenly brown, from rim to center. That’s overbaking, and they will hard, hard, hard and very crunchy. Maybe even burnt on the bottom. You want a rim around the edges that’s a dark brown (it basically reflects the color of the bottom of the cookie), but the center should only be a very pale golden color, and still look soft. It will firm up slightly after it cools. If you eat them as the come out of the oven, pretty soon you can get a good idea of which ones came out perfect, and which ones were only almost perfect.
This is what the bottom should look like:
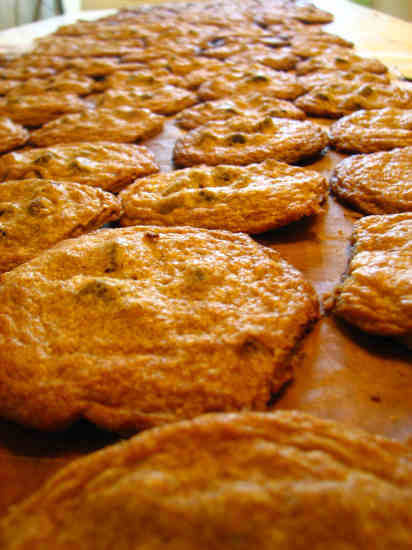
This is a cookie sheet with cookies properly placed.
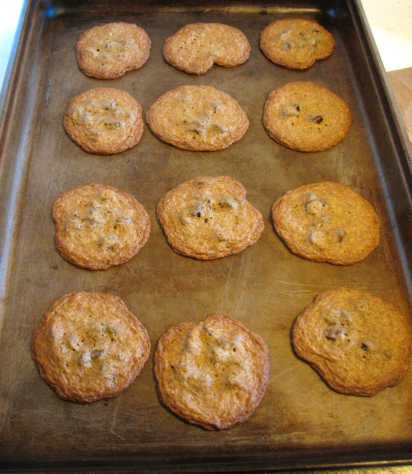
This is a cookie sheet with cookies place as close as they possibly can without merging into one big cookie (which would be a bad idea, because then you wouldn’t get the crispy-crunchy edges). You should really only do this if you’re baking 200 cookies and supper is waiting on it’s chance in the oven.

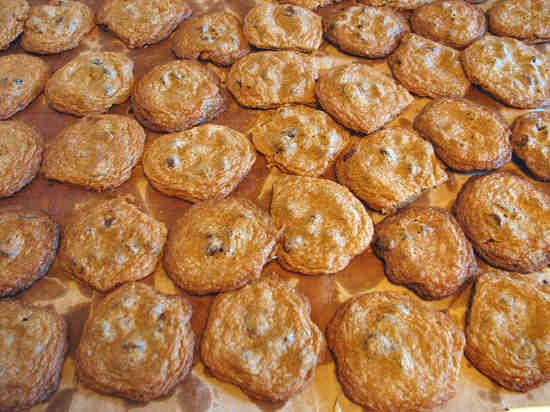
Let them cool for a minute or two, and then scrape them off the tray and onto brown paper. (I cut open a paper grocery bag, so it lays flat.)
Cookies in all their perfection.

Posted in Recipes | 3 Comments »
Due to an uncooperative camera, poor lighting, and batteries running out of juice, and a frazzled cook, there will only be a few photos accompanying this recipe. And unfortunately, this in not one of those “carved in stone” recipes, but one of those “wing-and-a-prayer, this is how I did it this time” recipes. Every time it’s made, it’s made slightly differently, and it’s assumed you will adjust things for your taste.
That said, here’s the ingredients:
12 lbs. meat
6 cans condensed beef broth
water
1 1/4 cups balsamic vinegar (actually, I wanted to use 2 cups, but I ran out)
3 tbl. oregano
2 tbl. basil
7 bay leaves
black pepper
5 stalks of celery
8 lbs. potatoes
6 onions
10-12 carrots
2 bags frozen peas (use ‘petite peas’, not those starchy, over-grown pasty things)
5 cups water
2 1/2 cups flour
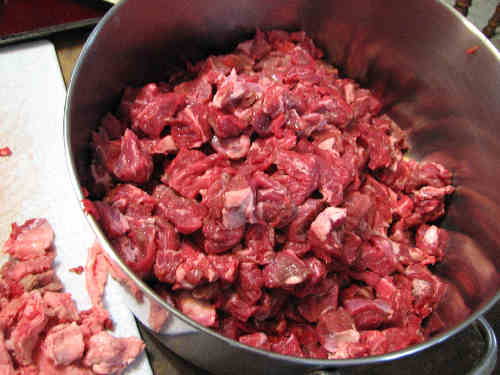
Chop the meat up into ‘stew-sized’ pieces, and put in a big pot (mine is 3 gallons).
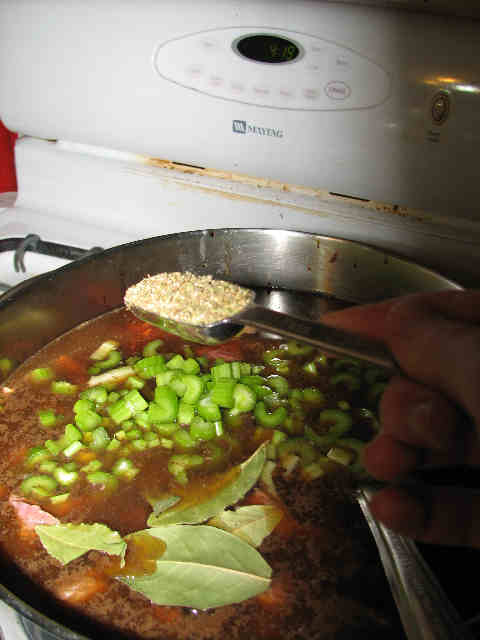
Dump in the cans of condensed broth, the balsamic vinegar, and water. I think I used about one can of water for every can of broth, but I’m not 100% sure. The liquid should generously cover the meat. Chop and add the celery. Season the mix.
Bring to a boil, and then turn down the heat to a simmer (gentle bubbling around the edges of the pot). Let simmer for about an hour. Meanwhile, prepare your potatoes. Some people like to peel them; I tend to prefer to just wash them. In either case, they need to be chopped up into stew sized pieces. (Though a note on un-peeled potatoes: if they are not thoroughly cooked, the peels can still taste “like dirt”. This off-taste disappears completely if the potatoes are cooked enough.) Add the potatoes to the pot 1 to 1 1/2 hours before you want to serve the stew. (The more stew you are making, the more time the potatoes will need to cook. So if you are significantly scaling down the recipe, you probably won’t need to cook them so long.) After you add the potatoes, again bring the pot to a boil, and reduce to a simmer.
Peel your carrots and chop your onions. Add them to the stew 15-20 minutes before you want to serve (10 minutes if you significantly scale back the recipe). I think this recipe doesn’t have enough carrots, but I like carrots. Most barbarians about don’t like them. So I put in this many, and then tell everyone at the table that if anyone doesn’t want their carrots to give them to me. This works out well; most everyone else winds up with less and I get as much as I want. But if you like carrots, you’ll want to scale up the carrot proportion. The timing for adding these carrots means they are done at “crisp-tender”–not crunchy like a raw carrot, but still with a good bite. If you like softer carrots, add them sooner.
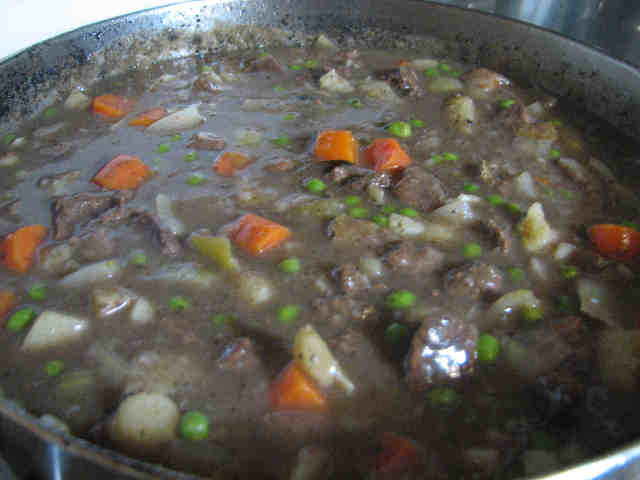
Right before you thicken the stew, add the peas. They don’t need to be cooked, just defrosted. You’ll know the stew is “done” by how cooked the potatoes are: they should no longer have sharp, defined corners from being chopped. They should be soft enough they are just beginning to round and smooth their edges.
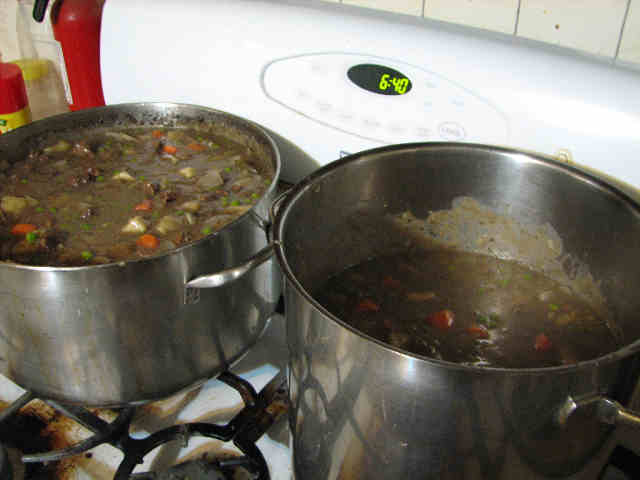
Lastly, you’ll need to thicken the stew with a flour and water mixture. I needed more pot space as soon as I started adding potatoes, so I split my stew up between my 3 gallon pot and my 2 gallon pot. I use 1/2 cup flour to 1 cup of water–3 cups of water and 1 1/2 cups of flour to one pot, and 2 cups of water and 1 cup of flour to the other pot. Whisk your cold water and flour together, until there is no lumps, and then add to the hot stew. Stir until thick and hot.
Close up, it looks even better.
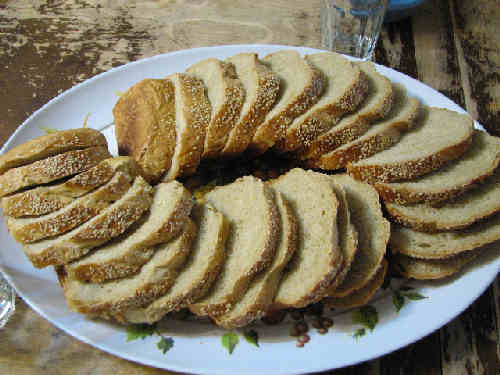
Serve with fresh, homemade bread.
Posted in Recipes | No Comments »
Also referred to, at least around here, as “Girlled Cheese Sandwiches”. It makes about as much sense; after all, I don’t cook them on a grill (I use a griddle), and, at least around here, they’re always made by girls.
Once upon a time, I got a subscription to Cook’s Illustrated. I think I was in my mid-teens. Anyway, I heard it was supposed to be a very technical magazine, which was why I was interested in it. (I’m one of those people who was utterly fascinated by getting chef textbooks out of the library, those books where they show you the proper way to use a knife and cut an onion.) I was utterly disappointed by the magazine. My memory says it was short on illustrations, 97% opinion, 2% keeping your eyes open while you worked and experimenting, and 1% technique. Well, thank you very much, I already had plenty of opinions, and didn’t see the need to pay that much for them. As for experimenting and keeping your eyes open, yes, it could be handy to have that work done for you already, as long as they were writing on a topic that was actually relevant to you. But, in that case, you’d usually already figured most of it out yourself.
The straw that broke the camel’s back was when they ran an article on the “best” way to make a grilled cheese sandwich, as though that was a great mystery. I’ve been making grilled cheese sandwiches for nearly as long as I can remember, and all the “wrong” ways were so absurd I’d never even tried making them that way. I read the article, thought “Duh! I’ve know all of this since I was 9 years old,” and canceled my subscription. I figured they ought to be handing out more insight than 9 year old, if they expected me to actually pay for it.
But, just in case they were right, and people really do want to be shown how to make grilled cheese sandwiches, I thought I’d do it properly. (But I didn’t just “discover” this method, and I make no claims it’s the “best” way. It’s just my version of common sense and good taste.)
To make sandwiches, you first have to start with the bread. You can use anything you have laying around, like this:
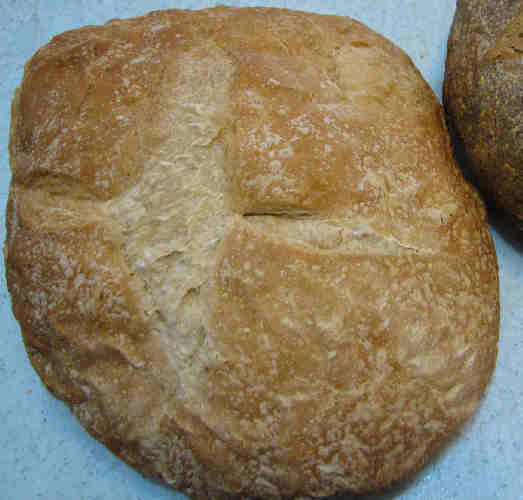
I made that bread a week ago, when cooking marinaded chicken. The bread used a starter, and long, cool raises, and then was baked on stones. I was quite impressed it hadn’t begun to mold or sour, and was only just beginning to dry out. I also used some loaf-bread I had made, ’cause this one loaf wasn’t enough. (I need to make three griddle fulls before everyone’s properly fed. This loaf made one griddle full.)
It should go with out saying that the better quality bread you use, the better your sandwich will be. Don’t think you can use some putty-like saw dust bread and get a good sandwich. Good bread makes good sandwiches, and bad bread makes bad sandwiches.
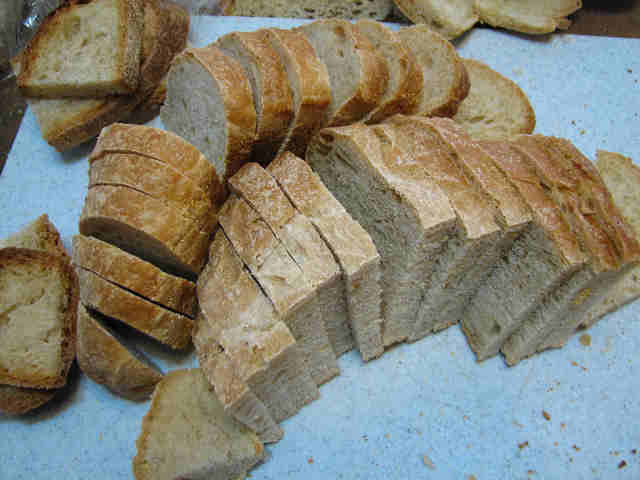
Slice your bread, assuming it isn’t a pre-sliced bread.
Arrange your bread in sandwiches on your griddle.
A good griddle is a thick griddle. They’re hard to find now; if you’ve still got your grandmother’s griddle, hang on to it. And don’t get suckered by claims of “non-stick”–I’ve yet to see a non-stick coating that didn’t come off the pan easier than the food came off the coating.
Butter your bread, every slice, the outside face only.

Use soft butter, or you’ll tear your bread. Anywhere the butter doesn’t touch won’t brown, but you don’t want to put the butter on too thick or you’ll wind up with a soggy, greasy sandwich.
Grate your cheese.

I got a minion to do this for me, so those aren’t my hands, in case you’re deathly curious.
I’m using swiss cheese, and a fine grater. The grater used to belong to a great-grandmother of mine, and they don’t make graters as sharp as they used to anymore. The finer you grate it, the easier it is to distribute evenly. Don’t go thinking you can just take out one of those plastic, square shaped slices and call it evenly distributed cheese–that stuff is pushing the boundaries of “edible”, and we’re talking about making food here. You can use any cheese you want, but it’s the same deal as the bread–the better the ingredients, the better the final product. If you don’t have to keep whacking people for trying to eat up all your cheese before you get it in the sandwiches and melted, you aren’t using good enough cheese.
Next, you add the cheese and seasonings to the bread.
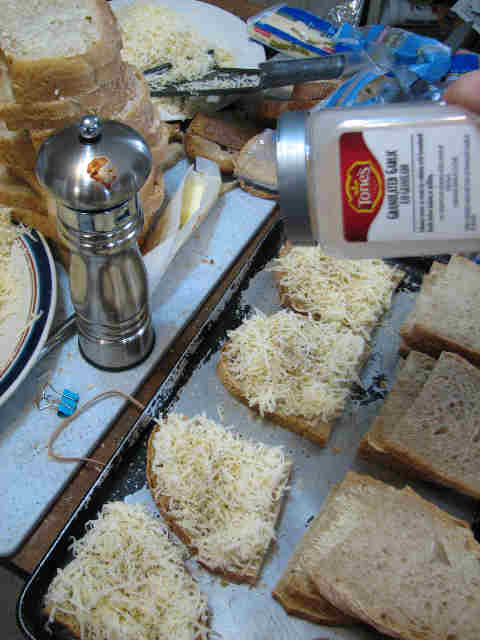
I’m using coarse ground black pepper and garlic powder. If you use muenster or mozzarella cheese, basil and oregano go great. Fresh rosemary would probably be good, too, but dried stuff is miserable. I used about 2 lbs. of cheese for 3 griddles of sandwiches. I open up half the sandwiches, put on the cheese and seasonings, and then close the sandwiches. Then I do the same for the second half. Arranging things on the griddle is really only important because I’m using homemade bread, which is slightly irregular, and you need to see how things fit together. If you were using very regular bread, you can just butter all the bread, lay down one layer, put on the cheese and seasonings, and then lay down the second layer.
Pop them on the stove, and turn on the heat.

The heat needs to be at “medium”. With my old gas stove that had all the markings wore off, this meant until the flame burned straight up, with no curve, and was pure blue, with no streaks of orange. With my new gas stove, that means “medium” on the back burners, “low” on my hottest burner, and “medium low” on my medium burner. The flame matches the description of my old stove, so I think that must be a pretty accurate description of the temperature. But the point of the heat is get the sandwich to cook right–too hot, and it will burn around the edges, and maybe even cook the bread before the cheese melts. Too cool, and your bread will get soggy from melted butter, and the cheese will start melting out of the sandwich before the bread burns.
Check to see if they need to be flipped.

This is accomplished by sticking your spatula under a sandwich, and lifting it up for a peek. For best cooking, a sandwich should only be flipped once, so wait until the underside is dark golden brown before you flip anything. Once that side is fully cooked, you can flip everything over.
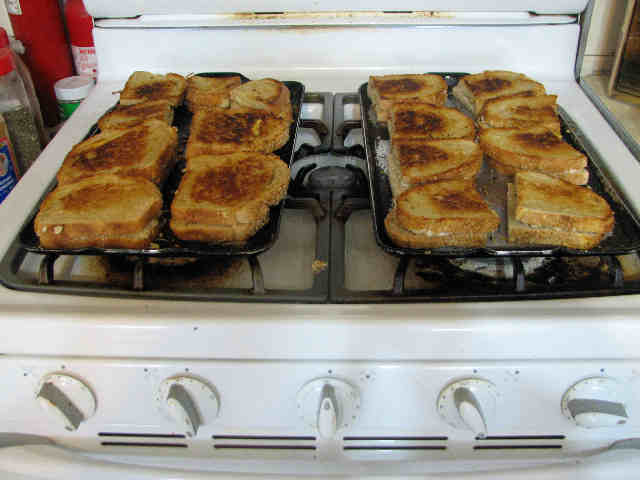
Look good, don’t they? Now you just need to wait until the second side cooks, but since the griddle has had plenty of time to get hot, it will be a much shorter wait. If you don’t keep an eye on them, they’ll burn.
Then they’re done, and ready to eat!
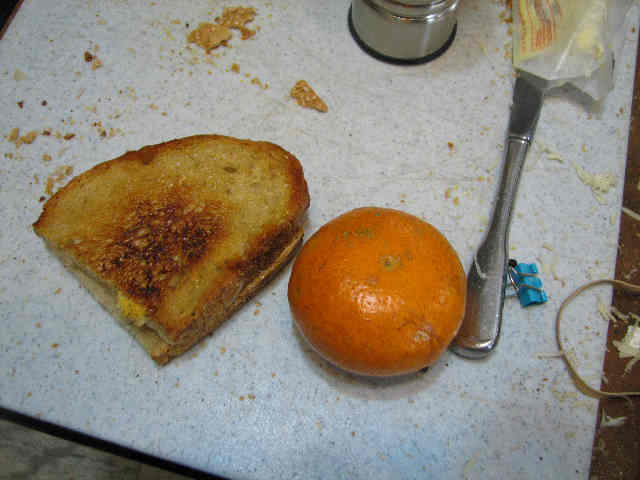
Since grilled cheese sandwiches are by nature high in fat content, it’s best if you can eat something a little acidic with it. I had a tangerine, but I bet the muenster/mozzarella sandwiches would be great dipped into a good tomato sauce.
Posted in Recipes | 1 Comment »
There is a poor sprite that drifts about these walls. She is entirely ungrounded in logic, or reason, or reality, and one never knows quite exactly where she is. I’m not entirely sure she knows where she is. At any rate, I feel I am constantly saving her life, either by reminding her to eat, or to sleep, or to come in out of the cold, all things which she has a propensity to either forget, or not see the use of, or simply find unnecessary, or hadn’t quite gotten to yet (even if it is only 6 degrees F and dropping, and dark out). Today I once again saved her from near certain death.
She cooks dinner once every other week, and today conspired to make Black Beans and Turkey (except, with ground beef) and Rice. This is taking life in her own hands, because it not only has the dubious beans, but also rice and soy sauce, two things which the most barbaric barbarians regard as an abomination. One might almost think she meant it as an act of hostility toward them, but this betrays a misunderstanding of the sprite. She simply never considered reality, or facts, among which includes a particularly hibernative barbarian being dragged out of bed at the utterly unreasonable hour of 5 am, and forced into labor.
So, in order to save her life, and theirs, and possibly even mine (I sit next to them at the supper table), I went about concocting emergency rations. The wilde beastes would need taming tonight, and that means food, namely dessert. With whatever ingredients were on hand. I chose Pound Cake.
The popular barbaric assumption is that Pound Cake is titled as such because you pound the cake, or pound someone with the cake, or pound someone in order to keep the cake as your own. At any rate, something to with pounding things, preferably people. In reality, Pound Cake is named such because this old recipe has very scientific beginnings, in which a pound of sugar, a pound of butter, a pound of eggs, and a pound of flour were all combined together and crammed in the oven.
Today’s recipe has been monkeyed with, and no longer has such elegance of proportions, but it is still nothing like that farce in a box that proclaims it is mix for ‘Pound Cake’ and produces only a light, fluffy, white cake. Pound Cake is golden yellow, very heavy and fine, has a chewy crust, a pleasant egg-y flavor, and cannot come out of a box at all, when so much of it is eggs and butter. It is best served with fruit, but is still quite good without.
Just as the ingredient list comes first, it is also wisest to gather all your ingredients, so raid the cupboards and freezers. The act is generally known in the highfalutin’ cooking world as mise en place, and which I cannot help but transliterate to missing place, generally meaning “See what’s missing from its place, lest you find yourself half-way through and in need of a few eggs, necessitating calling upon your neighbors to see if they might have one to spare.” Even barbarians like having neighbors around every now and again, though taking a break half-way through a recipe to drive a couple miles off and back again for an egg is still not as smoothly as things are meant to progress.
Usually, when said highfalutin’ cooking world depicts mise en place, they show all these cute little bowls carefully arranged, neatly and artfully, in front of a white clothed chef with the expression of cat who’s just caught a canary. Though I am not highfalutin’, I am no less artful in my missing place.
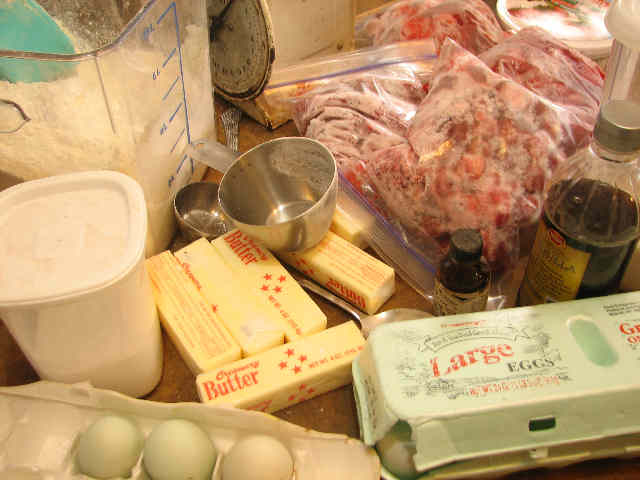
For 3 9″x5″ pans of Pound Cake, you will need:
6 sticks of butter
5 cups of sugar
15 eggs
6 cups of flour
1 tsp. salt
1 tsp. vanilla extract
2 tsp. lemon extract (or orange, or coconut)
Fruit of your choosing (I am using 16 cups of frozen strawberries, 8 cups sliced and 8 whole)
Preheat your oven to 325.
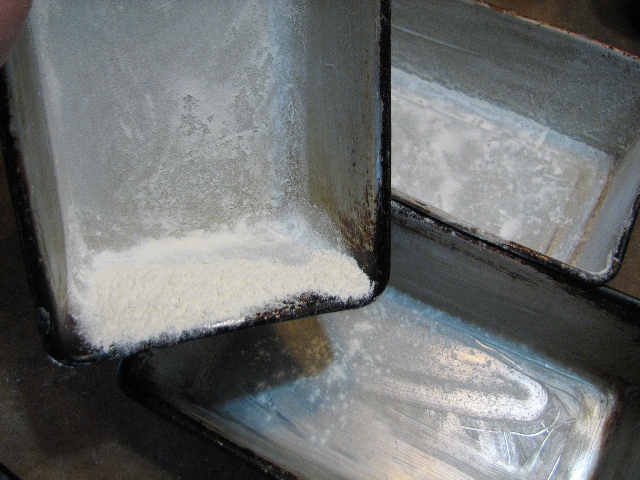
Butter three 9″x5″ baking pans. Don’t forget the corners and sides.

Flour them. I shake around the flour of one pan over the others, so any “spilled” flour can simply be used to flour the other pans.
And now, pray you have a mixer sufficient to the task. Meet my comrade in arms.
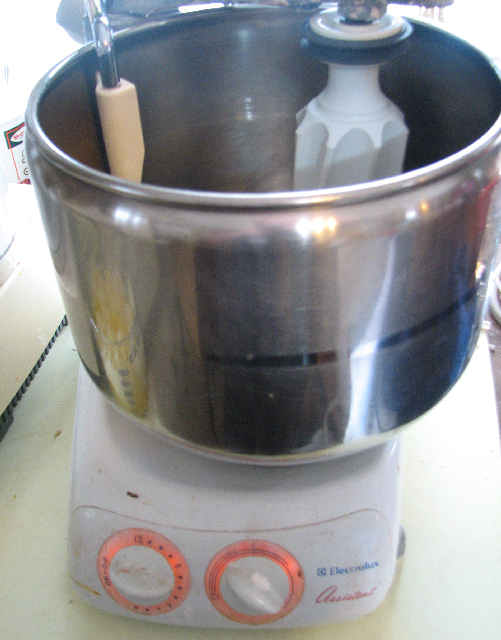
We don’t actually get along so well. I’m continually filling him to capacity, which he finds both uncomfortable and very difficult to manage. Meanwhile, I can’t stand his high-pitched grinding, especially since I already have to put up with so much other noise, high-pitched and otherwise. But for certain tasks, we declare a truce and generally work with each other. Pound Cake is one such task, and I would be loathe to be without him. (Don’t let my father hear I said that.)
Since I pulled my butter straight from the deep freezer, it is, of course, rock hard. Or as rock hard as pure fat can be. I chop it into chunks with a bench knife and pile it into a microwaveable vessel, and play a game of luck and chance attempting to get it soft enough for the mixer to handle without melting it. I lost.
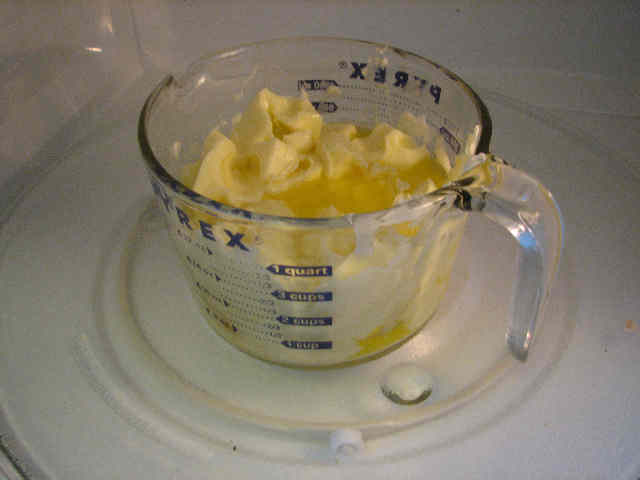
No matter, butter is butter, and it is still hard enough to cream. In goes the butter.
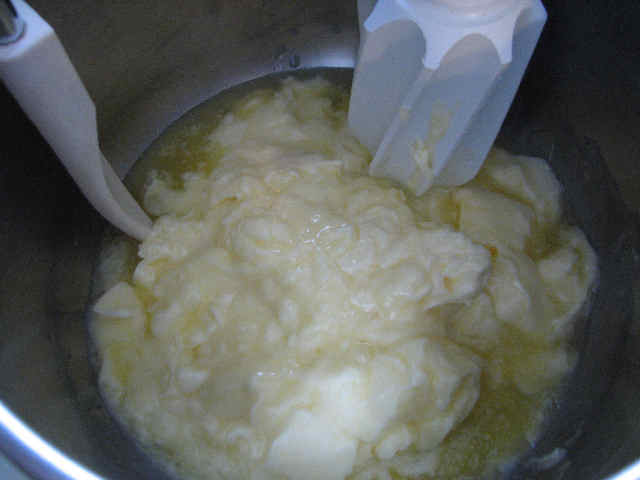
In goes the sugar (gradually).

And the machine cheerfully creams it creamier than you’ve ever seen butter and sugar get creamed. It is very white, and very fluffy.
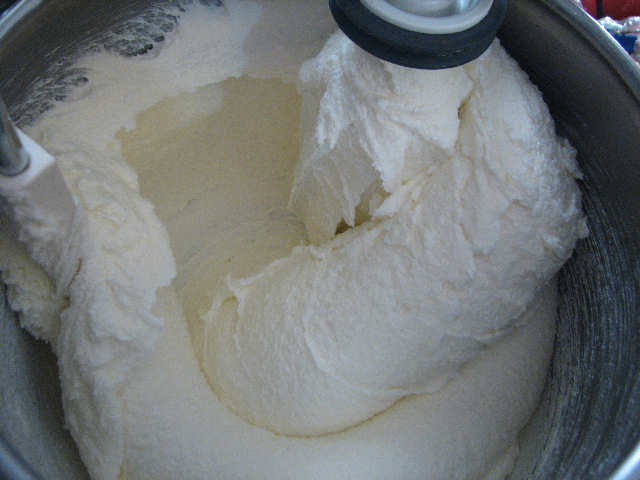
Next I begin to add the eggs, one by one. This is the part that makes mortal mixers cry like babies, because the mixture gets so thick. If you’re adding eggs while your mixer is running, be careful. I added one of my eggs rather carelessly, and shortly thereafter had to get out of the way as parts of egg yolk went flying.
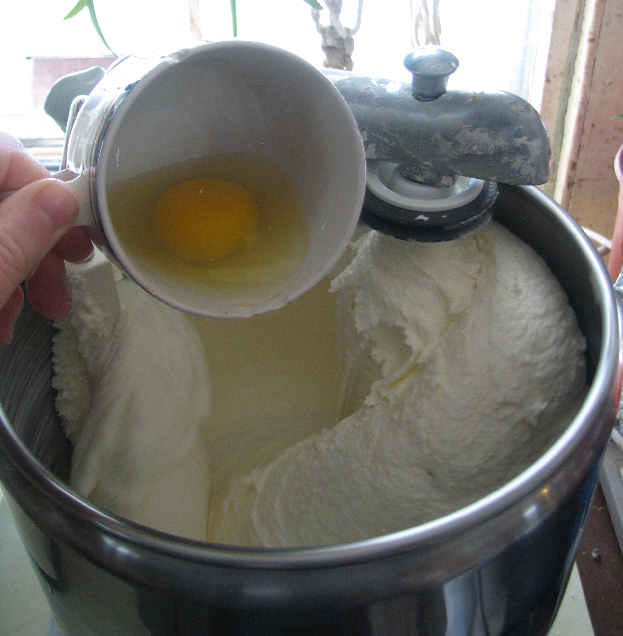
You may have to stop the mixer and scrape down the sides occasionally. Even my mixer misses some of the corners.
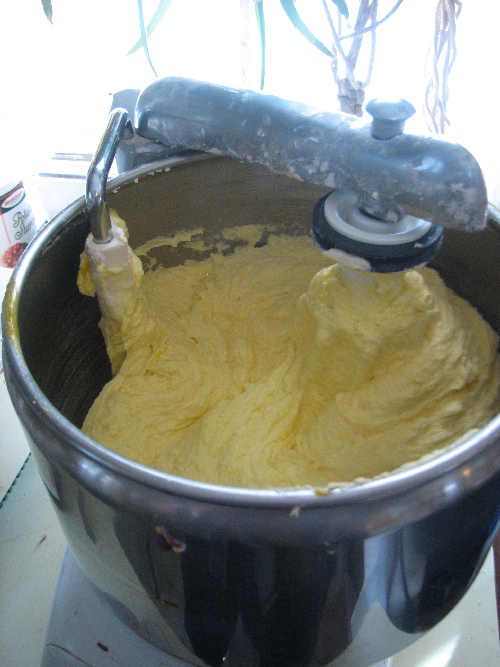
Having mixed in all the eggs, it still looks very fluffy, but is now a nice golden color.
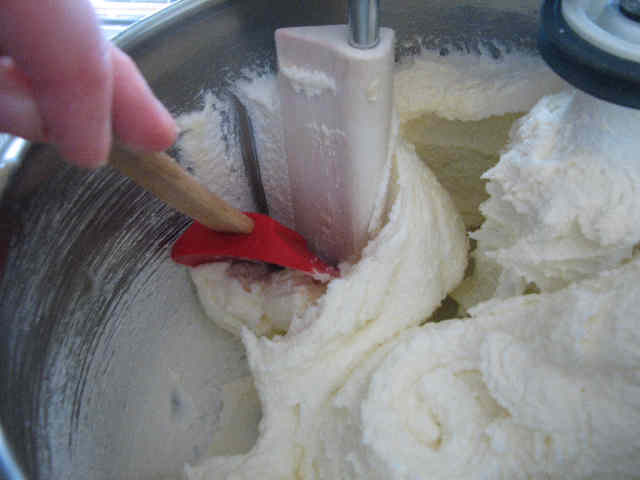
I do not sift in the flour, but it is important to mix it as little as possible at this point. Up until you put the flour in, the more you mix it, the lighter the cake will be. After you add the flour, any amount of mixing will encourage gluten development, and a tough, chewy cake. Mix it until just barely incorporated. Though the batter has a lot of air mixed into it, it is very, very heavy. I’ve sent many a good mixer to an early death making Pound Cake.
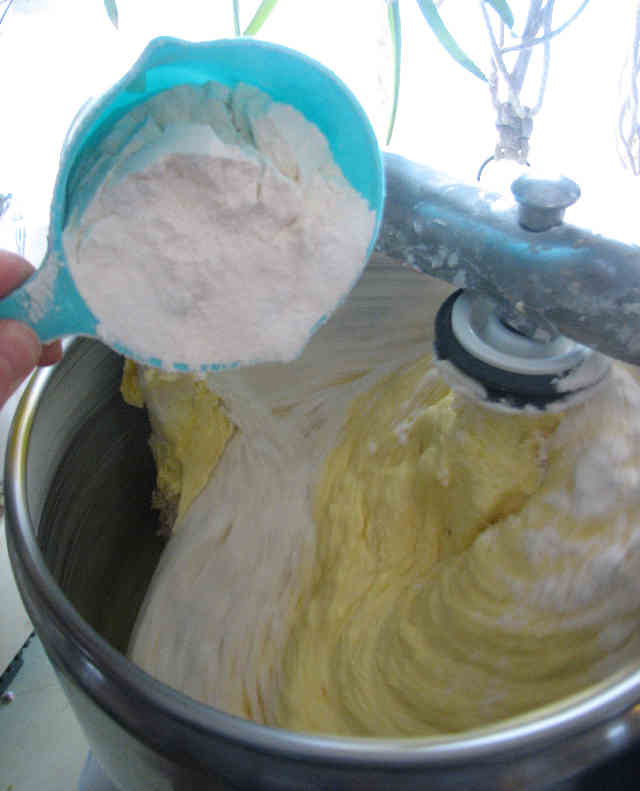
Add the salt and extracts, and again, mix as little as possible.

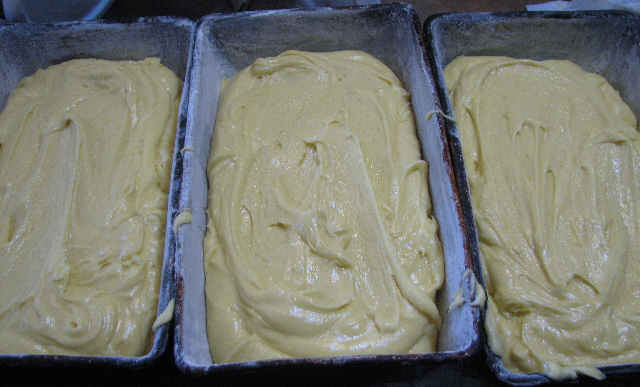
Dump it into the prepared pans.

Smooth them off prettily, like you’ve just caught a canary. . .
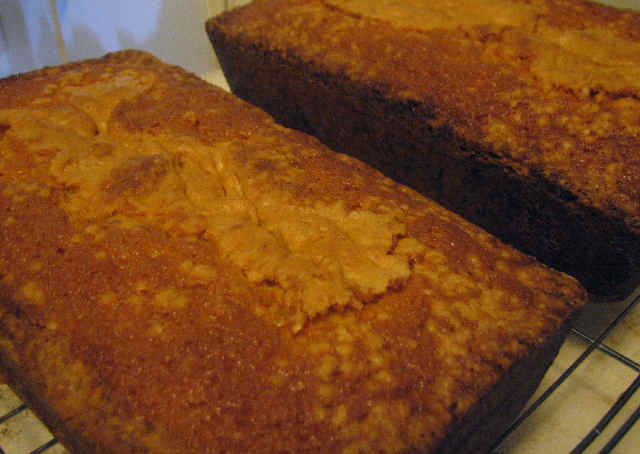
. . . and pop them in the oven for an hour and a half, or until a tooth pick inserted comes out clean. (If your oven runs hot, you’ll want to check them early.) They will be a deep golden brown on the top. Let them sit 5 minutes, and then turn them out on a rack to cool.
You can pop together the fruit sauce at the very last minute. I put my 4 bags (16 cups) of still mostly frozen berries in a pan, added 4 very generous soup-spoonfuls of cornstartch and one cup of sugar. I left it on low while I ate supper, but that hardly made a dent in it, so I turned the heat up to high, and kept stirring it. By the time the berries defrosted, the cornstarch and sugar had also thickened it.
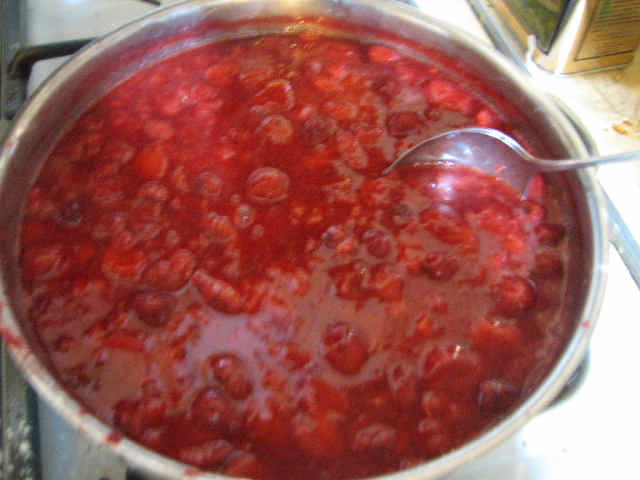
Here’s what you have:

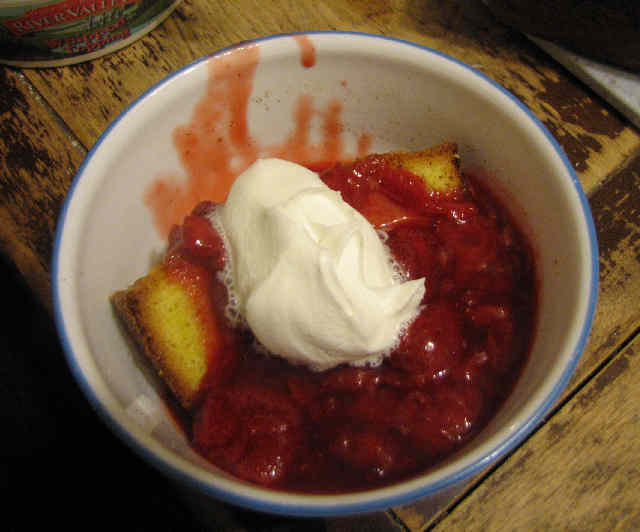
The original recipe says to “slice very thin”, which is of course a very funny joke. Take a nice slice,

put a generous ladleful of berries over it, add a dab of “whipped topping” (real whipped cream is of course much better, but generally not on hand during sudden emergencies), and enjoy.
My barbarians rapidly devoured all the strawberries, and two of the pound cakes. The third pound cake made scanty leftovers the next day. The matriarch said she didn’t care for warm strawberries, which was generally dismissed as absurd by the rest of the barbarians. The patriarch was trying to watch his cholesterol, so he ate (and thoroughly enjoyed) his warm strawberries over torn up, fresh-baked bread.
Posted in Recipes | 1 Comment »